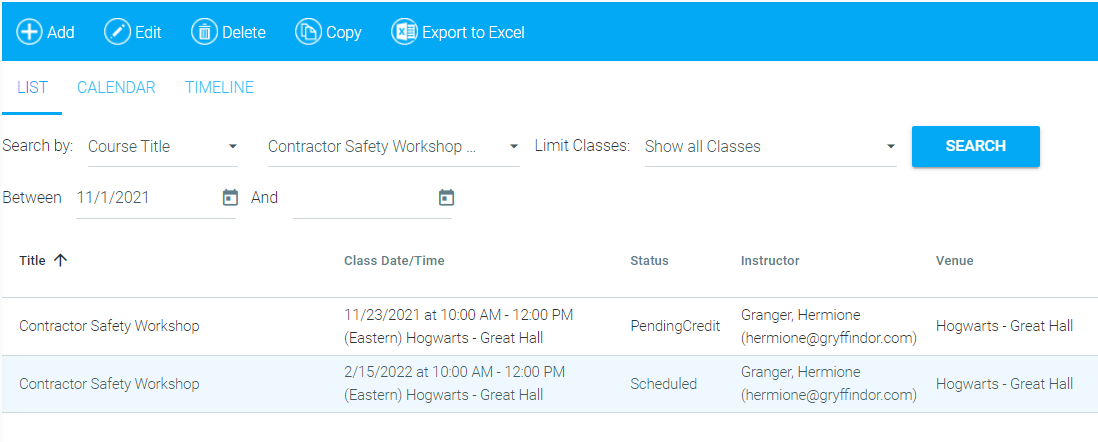
The Copy functionality allows the administrator to quickly copy an existing class instance and then make any necessary changes for the new class instance. To copy a course, go to Resources > Maintain Facilitated Sessions in the administrative console menu. Search for the class that you want to copy by title or other search criteria.
Tip: If you know the date of the class that you need to copy, enter an appropriate dates in the date range fields to narrow your results, then click the Search button.
A list of all of the class sessions that fit your criteria should appear. Select the desired class session in the list and click Copy in the top toolbar.
When you select Copy, the following pop-up box will appear.
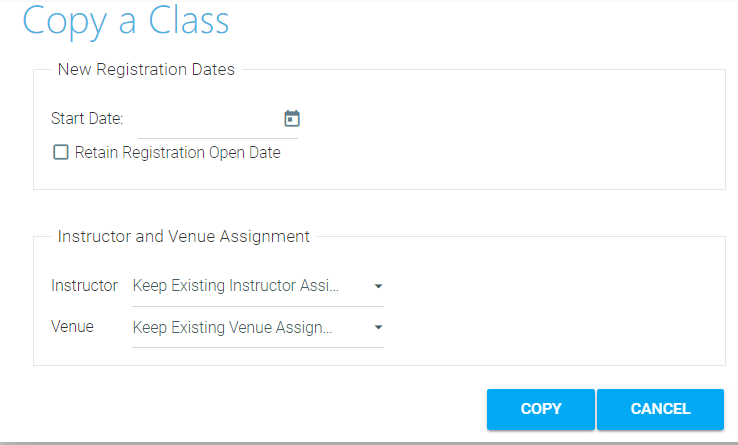
Enter the date of the new class instance in the Start Date field.
Check Retain Registration Open Date if this class instance should have the same registration open date as the original class instance. NOTE: If this box is left unchecked the Registration open date will follow the same rule that was used in the original class instance. For example, if the registration was open 21 days before the original class instance, then the registration will begin 21 days before the new class date.
Choose to keep the existing instructor or use the drop-down to select a new instructor.
Choose to keep the existing venue or use the drop-down to select a new venue.
Click Copy when you're done and OK on the confirmation box that pops up.
You will then be presented with three options. You can choose to close the window if you are done. Choose Edit the class I just created if you need to make changes to any of the settings. Choose Make another copy of this class if you wish to create a second copy at once.
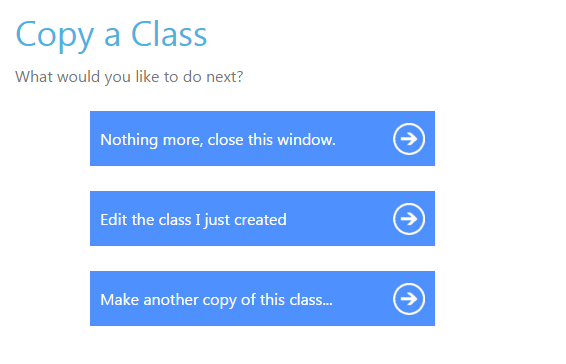
Repeat the above steps until you have created all of the desired copies of the class.
Create a New Class (The Class Tab)