You can choose to define a Simple Audience based on two rules or criteria (domain and template). A rule for a Simple Audience must include a domain or at least one person in the Included People list. You have the option to include an existing audience template with the domain. Users who match the domain values selected and/or belong to the existing audience templates will be included in the audience membership.
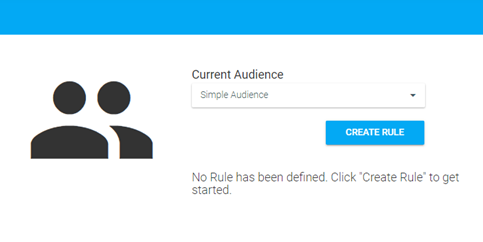
To define a Simple Audience rule, select Simple Audience in the Rule Type Selection screen and click Create Rule.
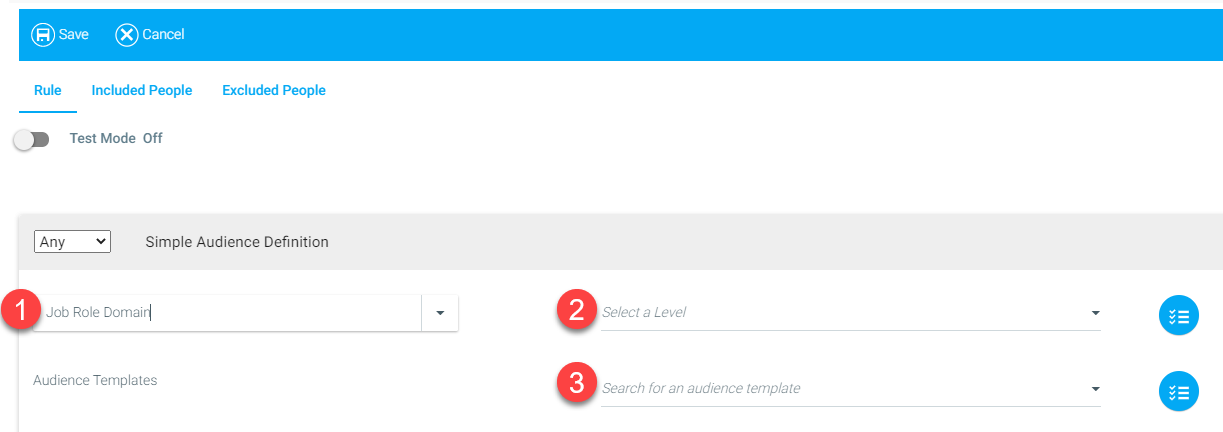
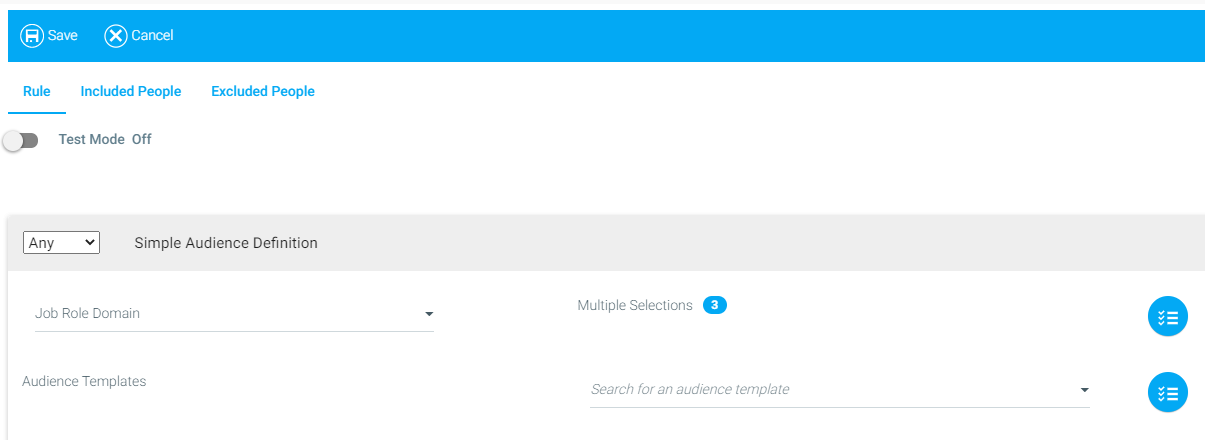
The Simple Criteria Definition screen will pop up. Select a Domain from the drop-down list (1). Then, type the Domain Value (level) or select from the drop-down list (2). You also have the option to include an existing audience template. To do so, type the name of the audience template or select it from the drop-down list (3).
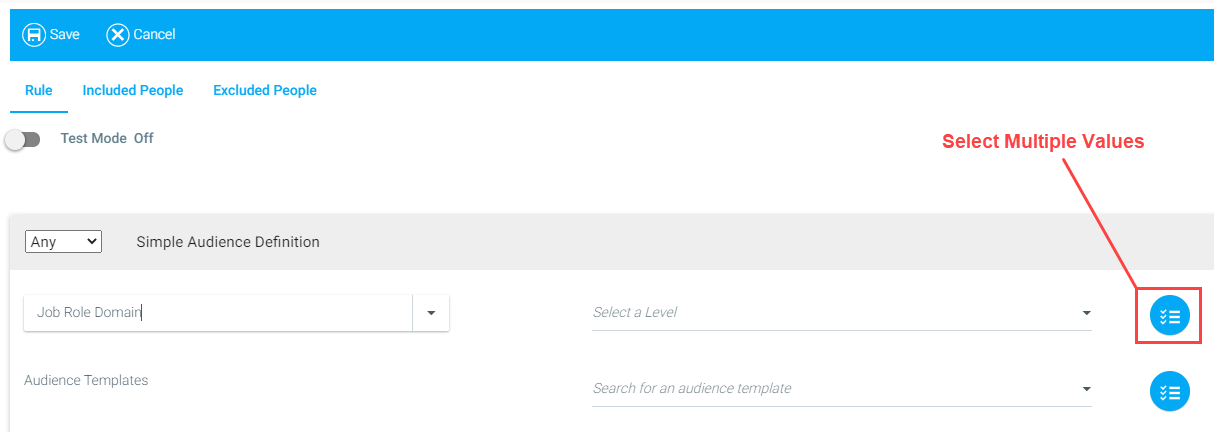
Selecting Multiple Values
From the Simple Criteria Definition screen, select the checklist icon to the right of the Domain field or the Audience Template field. This will open the selection window.
Select the values from the list displayed on the left side of the window. To narrow this list, or to search for specific values, type in the search field above the list. To select one or more values, click the checkboxes next to each value you want to include, then click the Add icon.
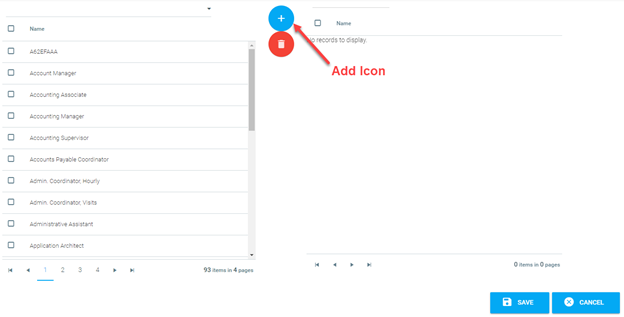
The selected values will appear in the column on the right. Enter a keyword in the search field above the right column to locate a specific value already selected. To deselect a value, click the checkbox next to the value, then click the Remove icon. Click Save.

The Rule Definition screen will now show the number of values selected for the rule. NOTE: If multiple values are selected for a field, the rule is processed by using the OR condition between values. For more information on conditions, please see the "Any/All Condition" section of the Creating an Advanced Audience Rule page.
Including Specific Users
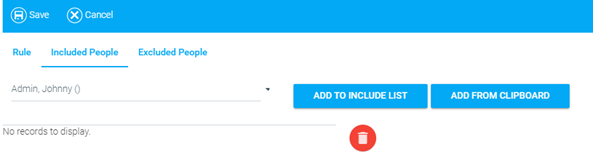
Click Included People to add specific individual users to an audience, even if they do not match the selected rule criteria. Type or select a user’s name from the drop-down list and click Add to Include List. In addition to the users in the selected domains or templates, these users will be included in the audience. To remove a user from the list, click on the checkbox beside the user’s name and click the Remove icon (trash can).
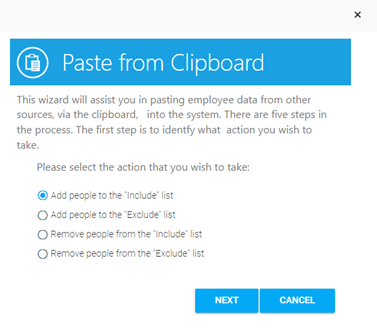
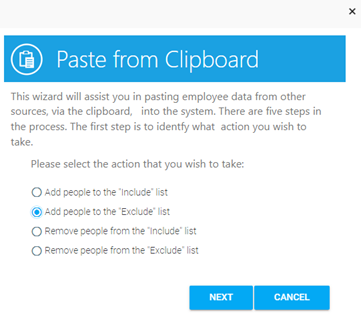
You can also use the clipboard to add employee data from another source. After clicking the Add from Clipboard button, the pop-out box below will appear. Make your selection and then click Next.
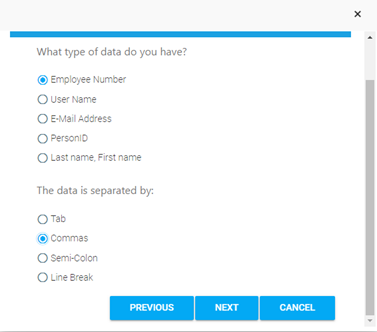
You will be prompted to select the type of data you have and how you wish to separate each piece of data. Make your selections and then click Next.
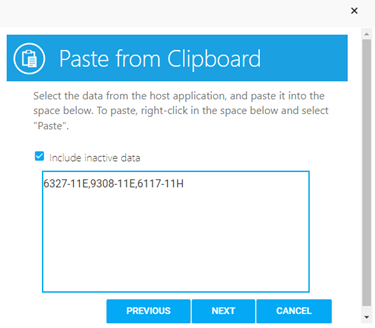
The next screen will have a text box for you to paste in all of the data. You can choose to include inactive data by clicking the Include Inactive Data check box. After you have entered all of your data, click Next.

The following screen will appear. The green check marks indicate that each employee ID number successfully matched a user in the LMS. Alternatively, if no match is found, a red X will be displayed next to the data entered. If you have a long list of employee data, it can be helpful to check the Show Only Mismatched Data box. This will display only the items that did not have a match.
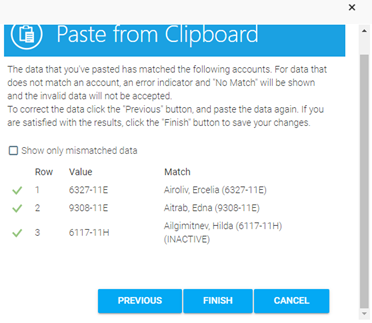
Click the Finish button when you are satisfied with all of the data selections in the Paste from Clipboard wizard. This will add all of the users to the Included People audience.
Excluding Specific Users
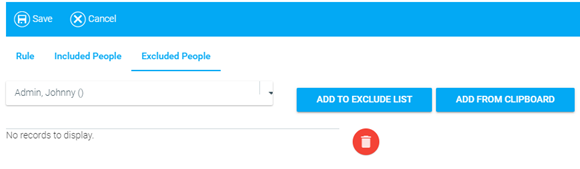
Click Excluded People to remove specific individual users from an audience, even if they match the selected rule criteria. Type or select a user’s name from the drop-down list and click Add to Exclude List. These users will not be included in the audience, even if they are part of the selected domain(s) or audience template(s). To remove a user from the list, click on the checkbox beside the user’s name and click the Remove icon (trash can).
You can also use the clipboard to add employee data from another source. After clicking the Add from Clipboard button, the pop-out box below will appear. Make your selection and then click Next.
You will be prompted to select the type of data you have and how you wish to separate each piece of data. Make your selections and then click Next.

The next screen will have a text box for you to paste in all of the data. You can choose to indclude inactive data by clicking the Include Inactive Data check box. After you have entered all of your data, click Next.

The following screen will appear. The green check marks indicate that each employee ID number successfully matched a user in the LMS. Alternatively, if no match is found, a red X will be displayed next to the data entered. If you have a long list of employee data, it can be helpful to check the Show Only Mismatched Data box. This will display only the items that did not have a match.
Click the Finish button when you are satisfied with all of the data selections in the Paste from Clipboard wizard. This will add all of the users to the Excluded People audience.