Use this screen to map a resource to a defined target audience.
There are two methods for creating an audience - Domain-Based Rules and the new Audience Rules Engine.
The Domain-Based Rules method lets you define an audience(s) based on domains and people, directly in the audience tab in the resource, or applying an Audience Template to that tab.
The Audience Rules Engine, using additional data beyond domains and more complex rule options gives the administrator further flexibility in managing learning assignments, and is managed through Audience Templates.
For an overview of audience mapping, see About Audience Mapping.
Below are separate sections below for using either Domain-Based audiences and the Audience Rules Engine.
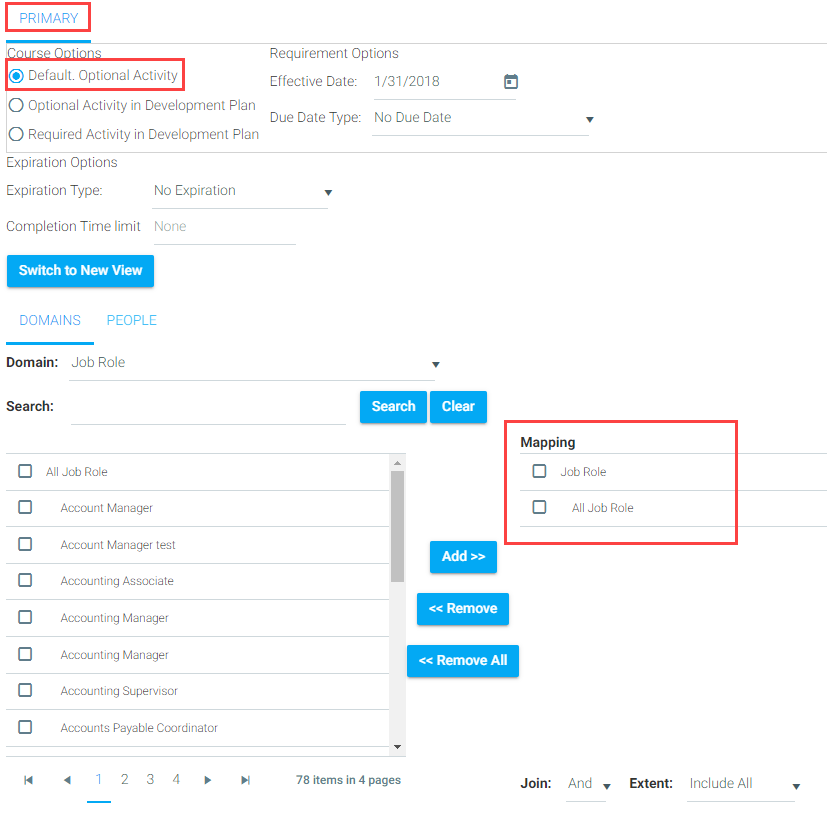
Use this tab to set options and map the primary target audience.
These settings control who will see or be offered the resource, and where in the system.
This controls whether the learner can see the resource in the catalog.
It also controls whether administrator(s) can see the resource to edit it, include it in Catalogs, Certificates, and Reporting.
Proper configuration of the PRIMARY tab and it's mapping is critical to the visibility and use of the resource.
Domain Mapping should be considered carefully so that the right learners and administrators can see and manage the resource, and restricted from those that should not.
This section defines whether the resource is required or optional, and controls when the resource appears to learners' Development Plans, and how the resource enrollment status appears for that learner in Reporting.
Default. Optional Activity - The primary audience will be shown on select reports and on the Manage Credit and Enrollment screen. This option will not place the course on a user's Learning Plan.
Optional Activity in Development Plan - This learning resource will be displayed on the primary audience's Learning Plan in the Optional Learning section. The resource will show as being on the user's Development Plan but will not show as required (e.g., in Reporting). Note that when this method is used, there is no system-generated notification to inform users that this course was placed on their Development Plan.
Required Activity in Development Plan - This learning resource will be displayed on the primary audience's Learning Plan in the Required Learning section. This option must be selected in order to activate Required Course Notifications and to display an audience member as required in Reporting. Note that when this method is used, Required Notifications must be used to inform users of this requirement. No generic enrollment notification will be sent, as is sent when a user is enrolled on their own, by a manager, or by an administrator.
It's an LMS best practice to use only "Default. Optional Activity" on the PRIMARY tab.
Although Optional Activity in Development Plan and Required Activity in Development Plan are available in the PRIMARY tab, the PRIMARY tab's function is to control the overall visibility of the resource to users and administrators - NOT to specify required training. These options should only be used in the PRIMARY tab if the company administrator is confident that visibility for this resource should be limited to most administrators, not visible in Catalogs, and used exclusively for required training.
To specify required or optional training to be assigned to user's Learning Plans - create a new, secondary audience and select one of the "in Development Plan" options.
For this reason, Requirement Options are discussed below in the section Add Secondary Audience.
For details on how to use and edit the Domains and People sub-tabs, see Audience Tab: Domains and People.
The Add Audience button at the top right of this screen allows an administrator to create additional audience tabs, at the same level as the Primary tab. This can be used to push the course out to a smaller, targeted audience. For example, a subset of the primary audience may be required to complete the course early, or the expiration requirement might only apply to a specific audience.
To add a secondary audience, click the Add Audience button. A pop-up box will display.
If this is a new audience that you will be creating, use the default “new audience” option. Enter a title, and, if desired, a description of your new audience.
If the audience you are adding is going to use an audience template, select the “from audience template option.” Begin typing the name of the audience template in the smart filter box and select the correct template as it appears.
Click Update to save your changes. A new audience tab has now been created based on your selections.
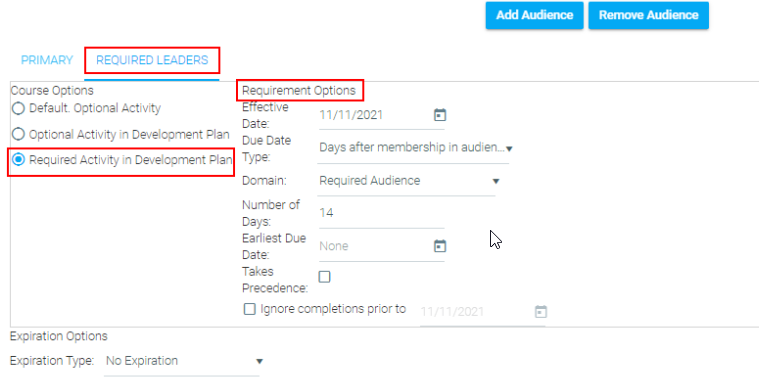
Now, set up the audience requirement options.
Specify Course Options Optional Activity in Development Plan or Required Activity in Development Plan.
Then configure Requirement Options and Expiration Options.
This section sets a due date for the audience, and how it will be calculated.
Effective Date - Enter the date that the requirement will take effect. If no date is selected, the effective date will default ot the date that the audience was created.
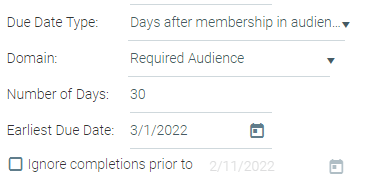
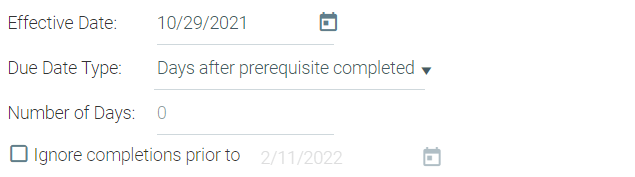
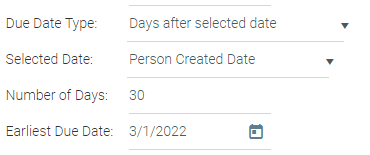
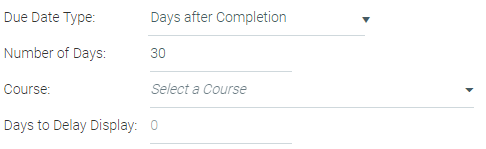
Due Date Type - Some selections from this drop-down menu will cause additional fields to appear. The following due date types are available:
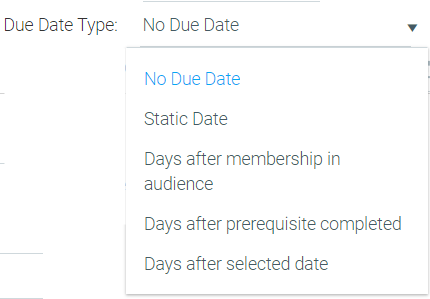
If you choose Static Due Date and a domain value (e.g., Required) for the audience, any new users who join that audience on or after the Static Due Date would immediately be Overdue/Past Due. As a result, these users could receive a Past Due notification before they receive a Notice of Required Learning. For learning that will be required for new users, it is best to choose the Days After Membership in Audience due date type.
Use Expiration if learners need to periodically retake the course.
This is often used when learners need to repeat a course yearly, for example, to be re-certified in a skill or to show compliance with a business practice.
Expiration can be thought of as recurring Required Training and as such, you can also use some of the Required Notifications as reminders.
Below is a description of Expiration Options and how you can use them to drive recurring required training.
 Expiration Options are available on the Primary audience tab, as well as any other added Audience tab.
The default setting is No Expiration. To enable Expiration, choose one of the Expiration Type options from the drop-down.
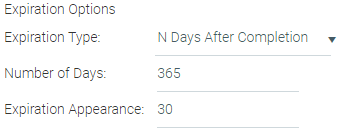
The option N Days After Completion will require the learner to complete the course, again, N days after the previous completion the learner had with that course. Because Expiration repeats, the previous completion could be the initial required training completion or a completion that was required by a previous Expiration. In any case, this option bases the new completion based on the LAST completion that learner had in the course.
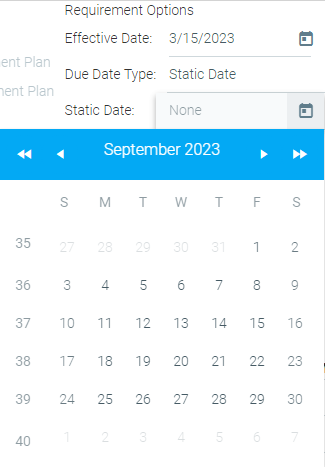
The Static Date option simply allows you to set a fixed date that the learner needs to complete the course again, with the new completion date not tied in any way to the last completion. For example, admins can use this when all new hires are required to complete a business code of conduct course, but all employees will need to re-take it at the end of the year, regardless of the date of their previous completion that year.

Expiration Type: N Days After Completion
Expiration Type: Static Date

Other Notes
When expiration is set on the Primary tab, users in the primary audience who completes the course (originally required or not) will be required to complete it again when it expires.
If expiration should only apply to a select group of users, use the Add Audience feature to create a targeted audience and set the expiration on that targeted audience tab.
AUDIENCES BASED ON AN AUDIENCE TEMPLATE
If the new audience was created based on an Audience Template, the domain drop-down and people options will be grayed out. Audiences created using an Audience Template reflect the current audience as dynamically defined in the Audience Template. If domains and membership have been changed SINCE the template was used to define the audience, that new audience is in effect. In other words, if there were 38 learners in the audience when the template was used to create it last month, and the administrator has now changed the audience template to include 300 learners, that new audience is now in effect for that audience tab in your resource.
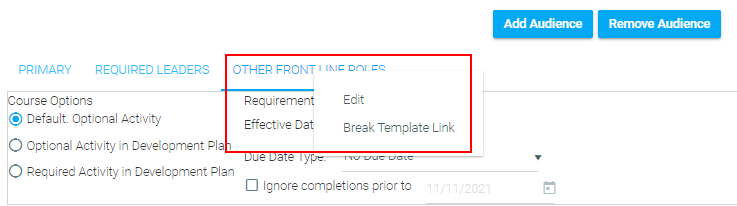
If desired, you can change the name of an audience tab that is based on an audience template. Right click the Audience tab and a menu shows, with EDIT as an option. However, do this with care as there will be no other indicator letting you know what audience template the audience was based on.
If desired, you can break the template link - this allows you to modify the audience directly in the resource without changing the actual template. Right click the audience tab and a menu shows, with BREAK TEMPLATE LINK as an option. Once you do this, you now have complete control of the audience, in your resource. However, it also means that any changes made to the audience template originally linked to this audience, will no longer be dynamically applied. This audience tab now has no relationship to the original audience template. To break the template link, right-click on the audience tab and select Break Template Link.
OTHER CONSIDERATIONS
If desired, you can change the name of an Audience tab. Right click the audience tab and a menu shows, with EDIT as an option.
Use the Remove Audience button to permanently delete an audience.
If you remove a required audience, the course will automatically be removed from all Learning Plans where it has a Not Started status. If an enrollment has an Incomplete status, the course will remain on the user’s Learning Plan even though the requirement has been removed.
If a user is a member of multiple required audiences for the same resource, the resource will only appear on their Learning Plan once. The nearest due date will be listed as the user’s Completion Deadline.
A new set of tools and UI (User Interface) is available to make it easier for administrators to apply advanced audience rules to learning resources - at the same time greatly increasing the power and flexibility of building audiences by adding additional learner data beyond domains, such as hire date, as well more complex rules.
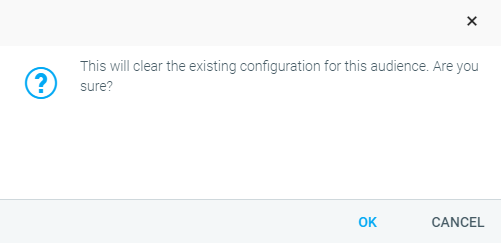
To access the new UI, click the Switch to New View button from the Audience tab.
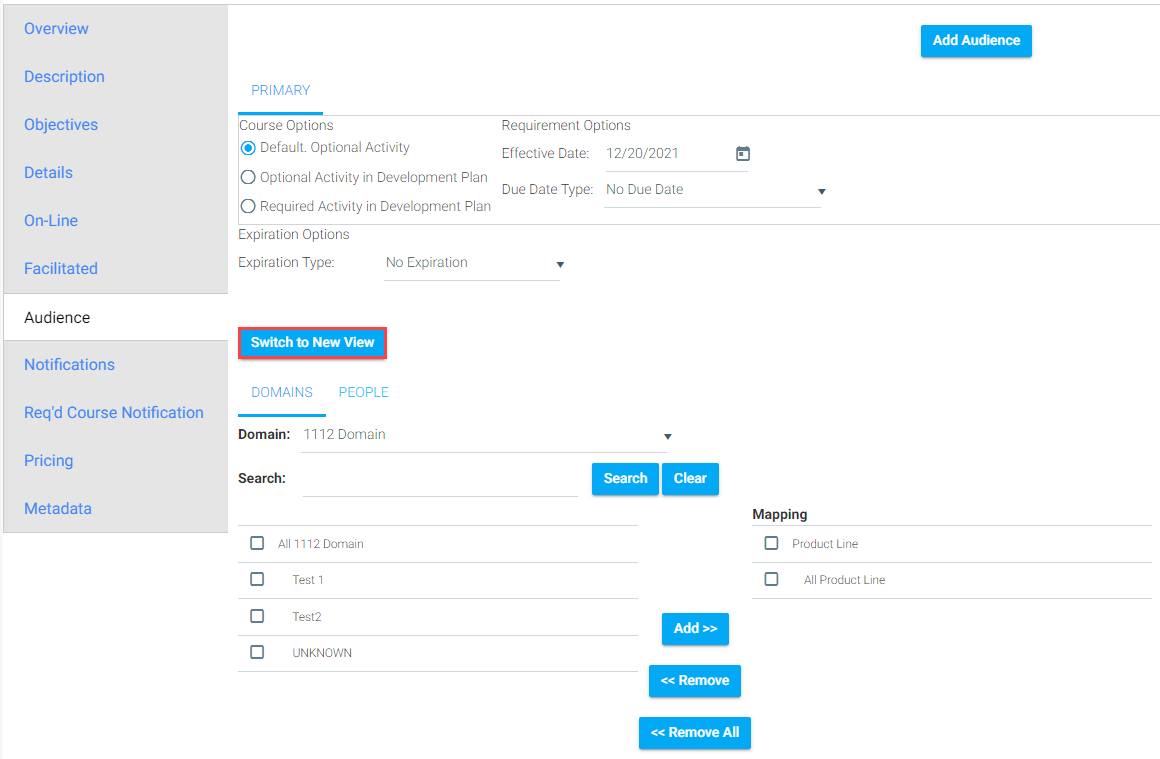
A pop-up box will appear to confirm that you wish to switch to the new view. If you have made any changes using the old view of the Audience tab, they will be deleted when switching to the new view. Click OK if you wish to proceed to the new view. Click Cancel to remain in the old view.
After switching to the new view, you will see the following screen with the new Audience Rules Engine.
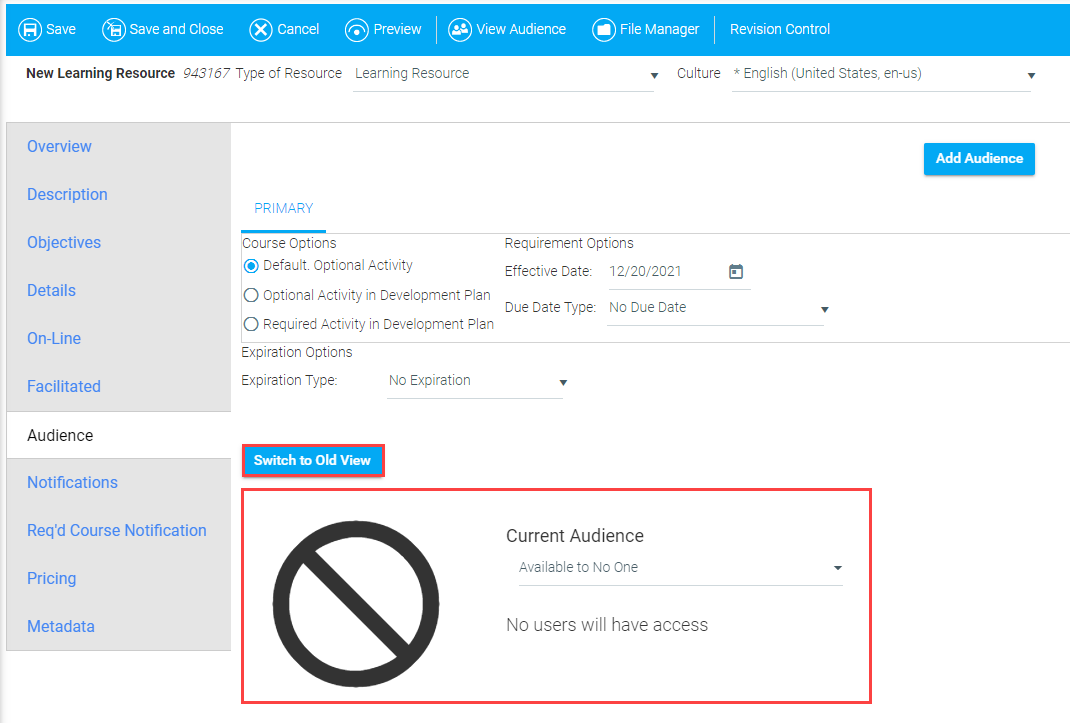
The new Audience Rules Engine allows administrators to create audience rules for each learning resource by making the audience available to everyone or no one, or by creating and utilizing simple or advanced audience rules. For instructions on creating audience rules, see OLD - Creating a Simple Audience Rule and (OLD) Creating an Advanced Audience Rule or visit the Using Audiences section of the Online Help.
You can revert back to the old view by clicking the Switch to Old View button.
To learn more about audience mapping and management, select from the list below or from the Help navigation tree.
Audience Tab: Domains and People
To learn more about how to use each tab, select from the list below or from the Help navigation tree.
To learn more about creating audience rules, select from the list below or from the Help navigation tree.