A certificate is a type of curriculum featuring a group of resources, all of which are required for the completion of the certificate.
A certificate can be used any time that you want to bundle a group of resources together and require the user to complete all of the attached resources in order to receive a completion for the certificate. The audience for a certificate does not have to be tightly defined. A certificate can be placed in the Course Catalog for any user to access.
A certificate can be made up of any combination of resources in the LMS. Curricula levels on the Certificate screen allow the administrator to organize the resources. One larger certificate can also be composed of one or more smaller certificates.
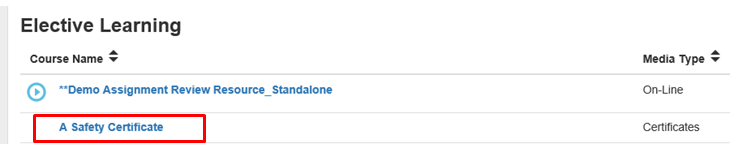
Only the certificate title, also known as the “enrollment object”, is visible on a user’s Development Plan.
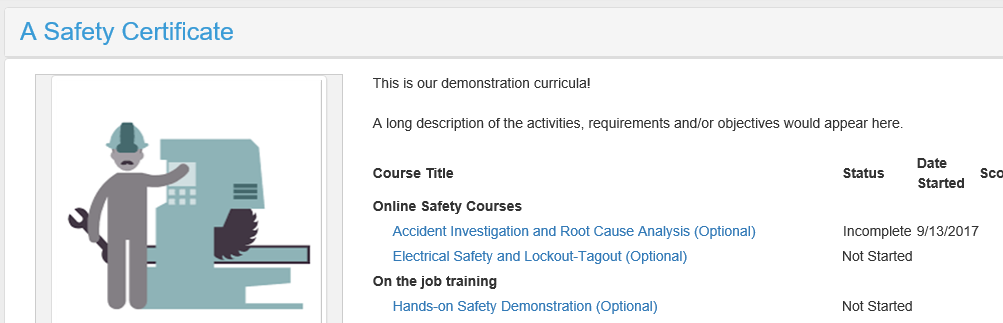
When the user clicks on the title, a new screen will open which lists all of the components of the certificate.
In the LMS, the term “enrollment object” can be used interchangeably with “certificate title.” Both of these terms refer to the resource that appears in the Course Catalog. When a user enrolls into the resource that is the enrollment object, then all of the components of the certificate are placed on their Learning Plan.
A certificate can only be created from already existing components. Before creating the certificate, make sure all the resources or sub-certificates that will make up the certificate are created.
Resources contained within the certificate will expire according to the expiration conditions that were set at the resource level of that component. This will not affect expiration of the certificate. If the entire certificate needs to expire, the expiration should be set at the resource level of the enrollment object.
When the certificate expires it will appear back on the Development Plan under the Required section. If a certificate that is part of a larger certificate expires, only the portion of the certificate that is set to expire will be placed back on the Development Plan.
Training Items that are created in the GXP module (ComplianceWire) can be placed in a LearnShare certificate. However the certificate is not validated, so only non-GXP courses that do not require validation should be placed in a certificate.
When the user launches the ComplianceWire training item, this training item will appear as an elective assignment in ComplianceWire.
If a new version of the ComplianceWire training item is created, it will not be automatically placed in the LearnShare certificate. An administrator would need to manually make this change.
The enrollment object for the certificate is created the same as other resources.
Go to Resources > Maintain Learning Resources on the Administrator's Console.
Select New from the top toolbar.

Type the title of your certificate on the Overview tab.
Change the Type of Resource from Learning Resource to Training Plan / Certificate Program.

Select the Certificate Media Type.
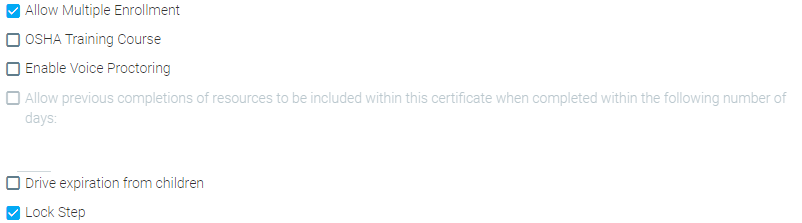
If users will need to complete this certificate multiple times, check the Allow Multiple Enrollments box on the Overview tab. If this certificate is going to expire, it must allow multiple enrollments.
Check Allow previous completions of resources to be included within this certificate if previous completions of resources that are a part of the certificate can be counted towards completion of the certificate. If you do not check this box, then the user will be required to complete all of the courses on the certificate (as part of the certificate), even if they have previously completed some of the individual resources.

A certificate cannot allow multiple enrollments and allow previous completions of resources to be included within the certificate. If you check Allow Multiple Enrollment, the Allow Previous Completions check box will be disabled.
Optionally, check Launch Certificate as Course to ensure that the certificate is automatically launched by the certificate player when a user selects the course. This will cause the blue Play button to appear on the certificate in the user's To Do List on their Home Page.
The Allow previous completions of resources to be included within this certificate when completed within the following number of days checkbox is an optional feature. Checking this box allows previous completions of child courses to be marked complete within a certificate if they were completed within an administrator-specified number of days prior to launching the parent certificate.
Example: A certificate entitled "Ladder Safety" was created and assigned to a user. Within this certificate are three child courses, "Ladder Safety 1", "Ladder Safety 2", and "Ladder Safety 3". The administrator checked the Allow previous completions of resources to be included within this certificate when completed within the following number of days checkbox, and designated this to be in effect 90 days prior to the user's initial launch of the certificate. The user already completed the "Ladder Safety 1" course 14 days ago. When the user launches this certificate for the first time, the system will see that there is a completion for the "Ladder Safety 1" child course within the 90 day period, and will grant the user credit for this child course within the certificate.
To have this feature enabled, please contact the Support Team.
Complete the Description tab and other optional tabs the same as any other resource.
Go to the Audience tab of the enrollment object to set the audience for the certificate.
Detailed information about how to set up these requirements can be found in the online Help section under the topic Create or Edit a Learning Resource.
Once the enrollment object has been created and saved, the certificate structure can be created. Follow these steps to create the certificate.
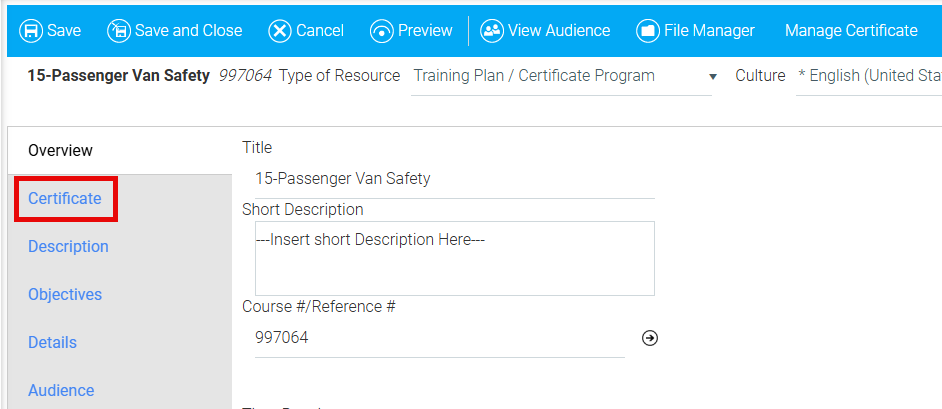
Select the Manage Certificate option in the top toolbar of the Resource.

If you do not see the Manage Certificate option, verify that Training Plan/ Certificate Program is listed as the Type of Resource it displays on all tabs so they don’t need to go to Overview to set it.
A pop-up window will appear asking you to confirm that you want to add resources to your certificate. Click OK.
The Administer Curricula pop-up screen should appear.
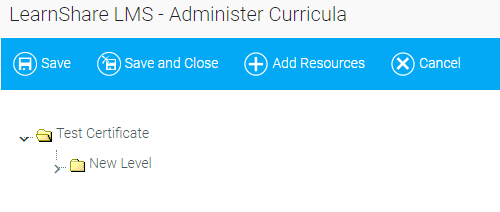
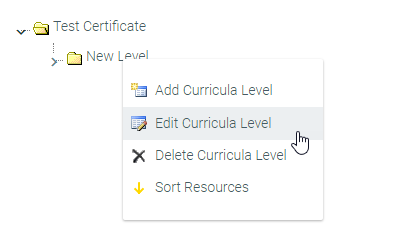
Right-click on the default New Level and select "Edit Curricula Level" to rename it.
Type in the name of the folder. Remember that users will see this name on their Development Plan.
Right-click on this folder and click Add Curricula level if you need to add additional levels. Once you have created each curricula level (folder), you are ready to add the resources.
Click the Add Resources button in the toolbar. A pop-up window will appear:

Filter this list to find the selected resource(s).

Or you can type a keyword in the text box:

Click the Search button. A list of resources will appear in the left panel.
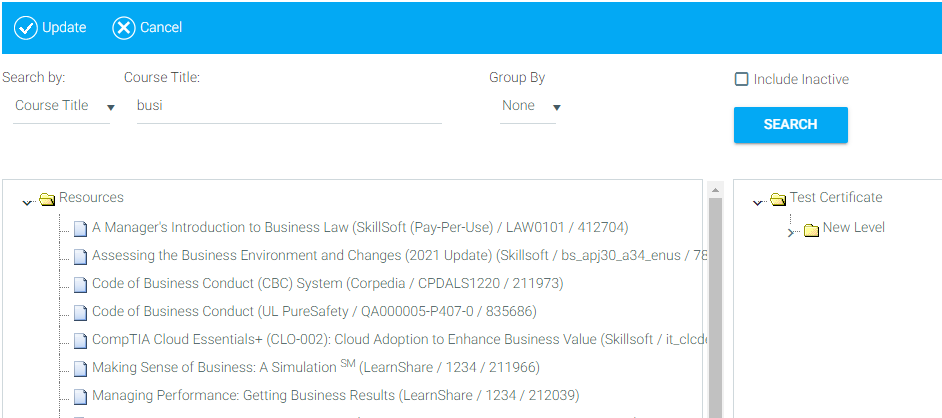
Drag and drop the resources you want from the list on the left to the curriculum level on the right.
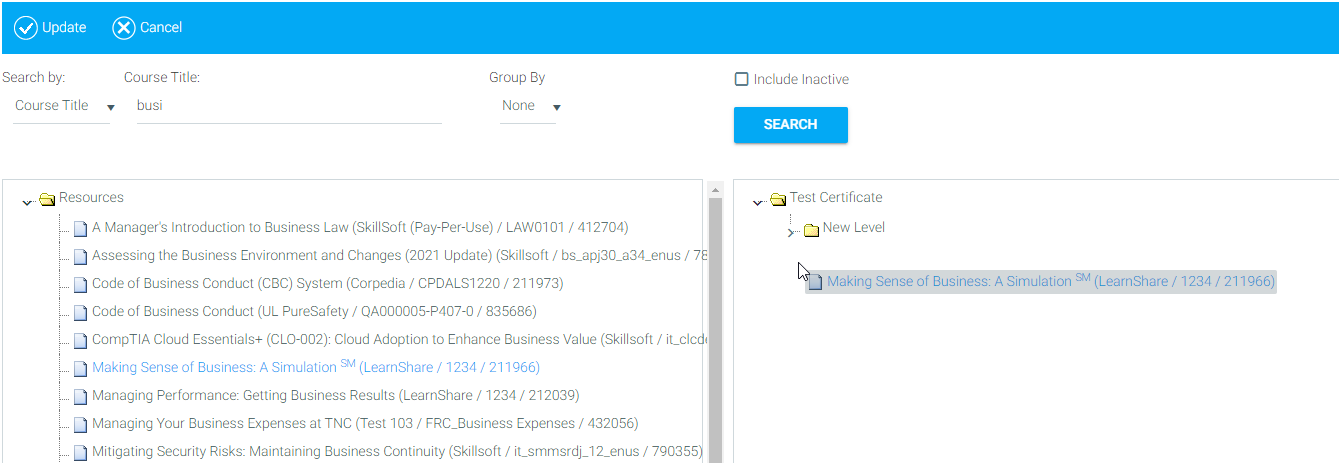
Click the Update button to save.
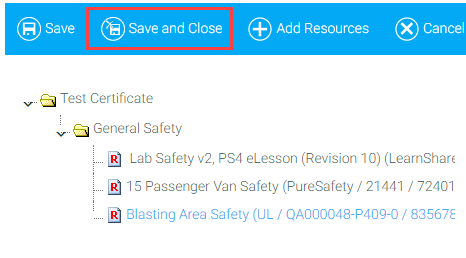
Click the Save and Close button to save all of your changes and return to the Maintain Learning Resources screen.
If your company is configured to use advanced certificate rules, then the following certificate options are available:
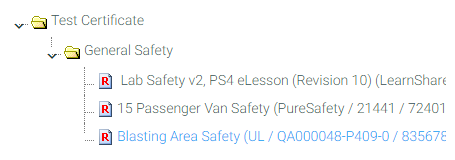
Required vs. Optional Resources - Resources will default to the Required status, as indicated by the red R on the resource icon. If desired, a resource can be optional within the certificate. To change the resource status, click on the resource title in the Administer Curricula window. The resource details will display on the right side of the screen.
Select the radio button next to Optional Activity to change the status. The red R will disappear from the resource icon indicating that the requirement for this resource has been removed. Any section of a certificate can either contain required resources, optional resources, or a mix of both.
Section Requirements for Optional Resources – Within any section of a certificate, you can indicate how many of the optional courses must be completed in order to complete the certificate. For example, if a section contains five optional resources, you might require the learner to complete any two of them. Or if no optional resources need to be completed, you can set this to zero.
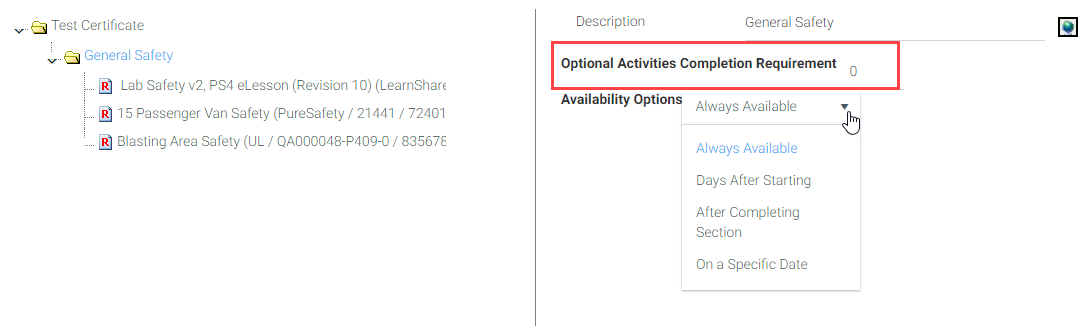
When requiring the completion of any optional resources within a certificate section, consider naming that section in such a way as to convey the requirement to the learner (i.e., Advanced Courses - Complete All Required Courses and Any Two Optional Courses).
Availability Options – You can set rules to control when certain resources become available to users within a certificate. Select the section you wish to set availability options for and make a selection from the drop-down menu.
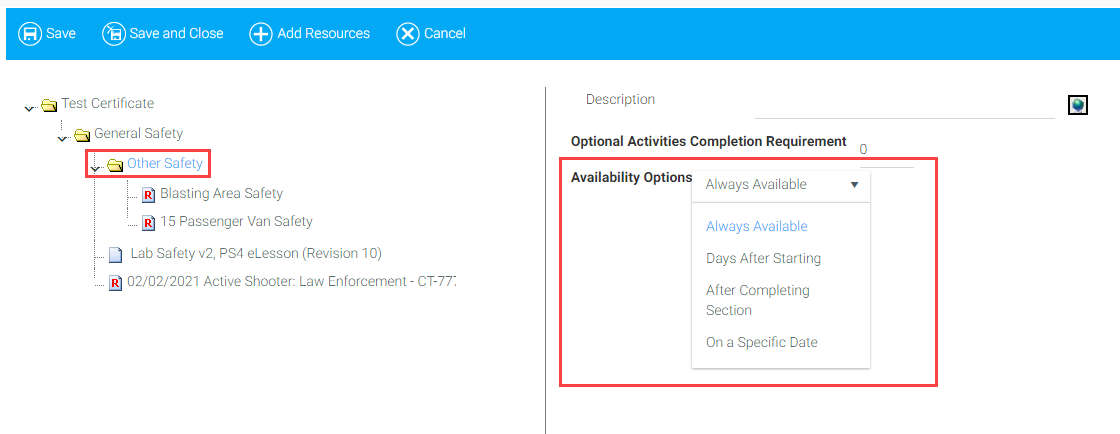
Click Save and Close after you have made your selections.
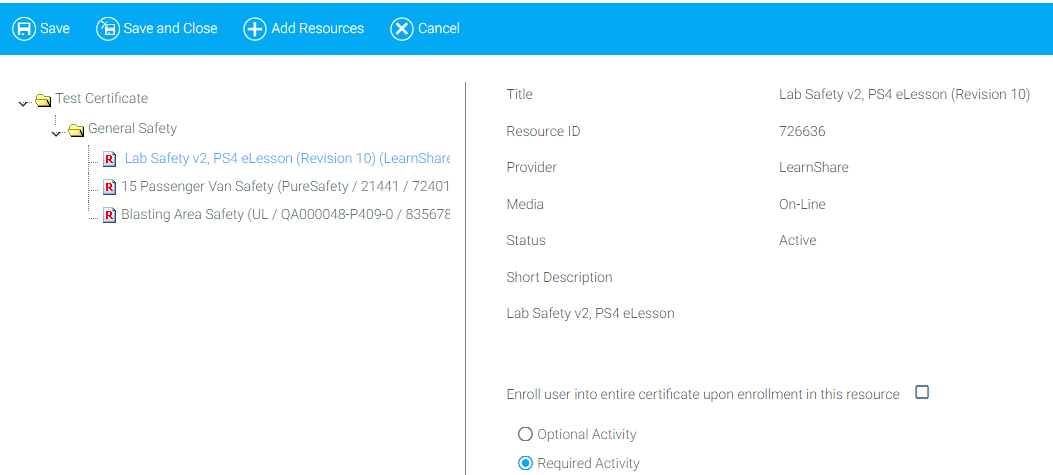
Once the resources have been added to the certificate, you can set the resource enrollment options as needed. If a resource can only be completed as part of the certificate:
1. Click on the name of the resource from the Add Resources screen.
The Resource overview will appear on the right-hand side of the screen.
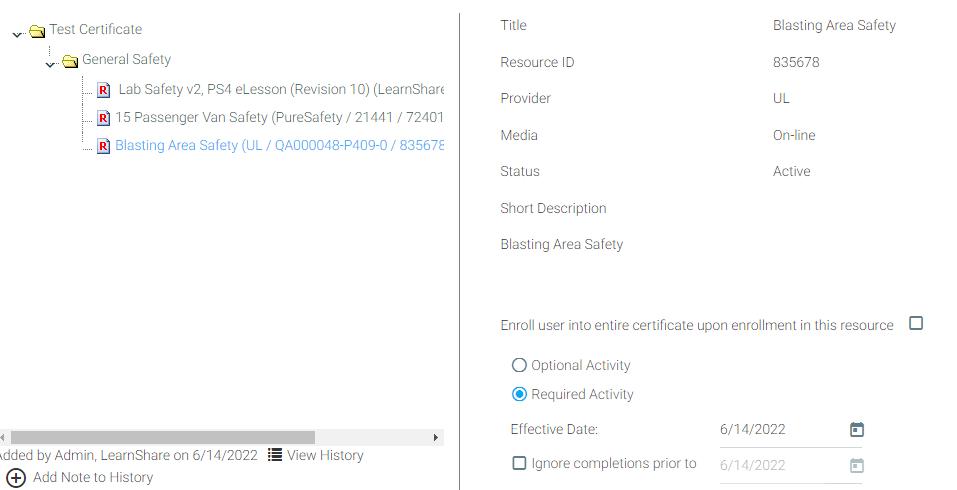
2. Check the Enroll user into entire certificate upon enrollment in this resource box.
When this is checked a user who enrolls in this resource will have the entire certificate added to their Development Plan. This means the resource can no longer be used outside the certificate.
The Lock Step feature allows an administrator to force the user to complete the courses in the desired order. It essentially makes each resource within the certificate a prerequisite to the next one.
This feature may not be turned on in all systems. Please contact Client Support if you are interested in this feature.
To use the Lock Step feature:
1. Create the certificate and add the resources in the order in which the learner should complete them. You can drag and drop the resources if needed to place them in the desired order.

2. Save and Close the Administer Curricula pop-up box.
3. On the Overview tab of Maintain Learning Resources, you should now see the Lock Step check box. Check this box to lock down the order in which the resources can be completed.
4. When the learner sees the certificate only the first resource will be available to launch.
Once the certificate has been in use, you may need to make some changes to it. To edit an existing certificate, go to Resources > Maintain Learning Resources. Search for the resource that is the enrollment object of the certificate and edit it. Once the resource is opened, click Manage Certificate in the top toolbar.
To add or remove resources, follow the steps that are outlined in Create a Certificate.
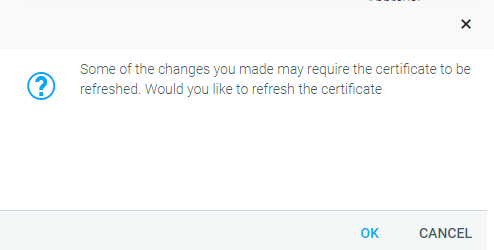
After making changes on the Manage Certificate screen, you may see the following pop-out notification. If you would like for your changes to apply ONLY to enrollments going forward, click Cancel. If you would like for your changes to apply to existing and/or past enrollments, click OK and you will be taken to the Refresh Certificate screen.
When resources are changed on a certificate, by default, that change will only affect enrollments that are created after the change. If previously enrolled employees need to complete additional resources, or may qualify already after resources are removed, you will need to use the Refresh Certificate option.
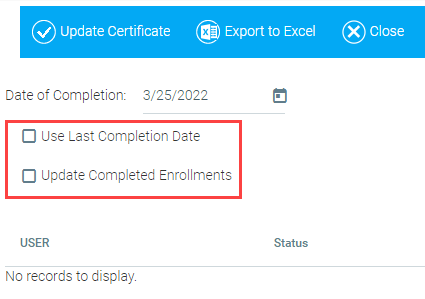
Edit the resource that is the enrollment object of the certificate. Click the Refresh Certificate button on the top toolbar. The Refresh pop-up will appear.

To update the certificate only on existing enrollments, not started or incomplete ones, simply click Update Certificate in the top toolbar. You do not need to check any other boxes.
To update the certificate on previous completions, check the Update Completed Enrollments box. When this box is checked, the LMS will check all completions of this certificate and place the certificate back on the Learning Plan of individuals who have not completed any new requirements. The LMS will not automatically notify users that this change has occurred. If you have removed resources, the LMS will search all of the existing non-completed enrollments of the certificate and grant completion to all users who have completed all of the remaining resources.
Click Update Certificate in the top toolbar once all of your selections have been made.
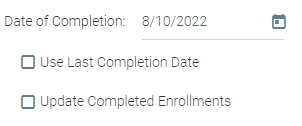
If new resources are added to a certificate and other resources are removed, you may want to check both the Use Last Completion Date box and the Update Completed Enrollments box . When both boxes are checked, the LMS will review ALL enrollments in the certificate and make any necessary status changes based on the new requirements. Any enrollments that are changed to a complete status would have a completion date of the most recently completed resource within the certificate.
If you need to manually grant completion for a certificate, please be aware of the following:
If a completion is granted on the enrollment object instead of the individual resources, the entire certificate will move over to the user’s history. However, the individual resources will keep their current status.
In order to avoid this scenario, completion should be granted for the individual resources on a certificate. The easiest way to grant completion for individual resources within a certificate is to use the View by Person option on the Manage Credit and Enrollment screen. This view shows each resource within a certificate in addition to the enrollment object. Once all of the resources are complete, the enrollment object (and thus the certificate) will automatically mark complete and the entire certificate will move over to the user’s history.
If you need to manually grant completion for a certificate, please be aware of the following.
If a completion is granted on the enrollment object instead of the individual resources, the entire certificate will move over to the user’s history. However the individual resources will keep their current status.
In order to avoid this scenario, completion should be granted for the individual resources on a certificate. The easiest way to grant completion for individual resources within a certificate is to use the View by Person option on the Manage Credit and Enrollment screen. This view shows each resource within a certificate in addition to the enrollment object. Once all of the resources are complete, the enrollment object (and thus the certificate) will automatically mark complete and the entire certificate will move over to the user’s history.
When do I need to refresh the certificate?
Some example scenarios include:
When do I NOT need to refresh the certificate?
Some example scenarios include:
The options vary based on the updates needed to the enrollments. It is important to understand that refreshing a certificate and utilizing Update Completed Enrollments can force all learners who have previously completed this certificate to complete the updated version of the certificate.
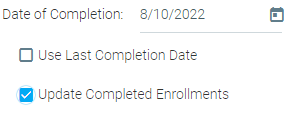
Refresh Option 1: Don't Check Any Boxes
This will update the certificate ONLY on existing non-complete enrollments. Then, it will take into account whether or not the change in the certificate qualifies the certificate to be complete.
Example: You edited a certificate that contained seven modules. You removed two modules, so now you have five modules. If the remaining five modules are complete, it will move the certificate to a completed status and use the date in the Date of Completion box.
Refresh Option 2: Check Update Completed Enrollments
This option will force all learner enrollments to be reviewed, which could potentially force a completed certificate back to the user's development plan. Like Option 1, it will review the certificate to see if the certificate qualifies to be complete/incomplete. If it determines that the certificate is complete, it will use the date in the Date of Completion box.
Refresh Option 3: Check Use Last Completion Date Box
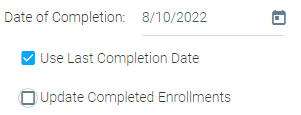
This option will review all non-completed certificates for a possible status change. If the refresh of certificate qualifies for a completion status, it will use the date of the latest module completed for the certificate completion date.
Refresh Option 4: Check Both Boxes
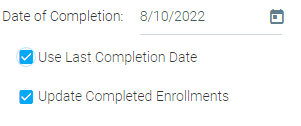
This option will review ALL enrollments and update if applicable enrollments qualify for a status change. It will use the completion date for the certificate as the date of the last child.
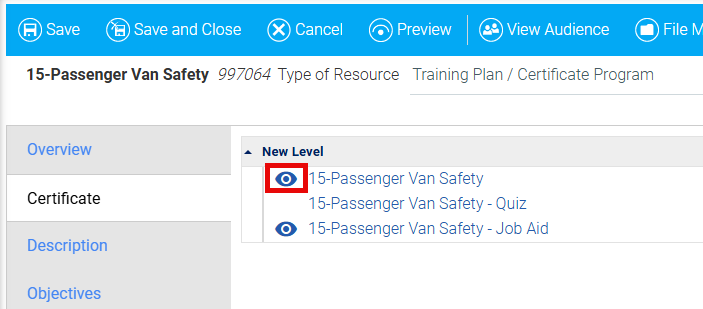
The Certificate Tab will be visible on all learning resources that are categorized as "Training Plan / Certificate Program". The Certificate Tab can be used to quickly see the contents of the certificate (e.g., different levels of training courses, job aids, quizzes, etc.).
If a learning resource has a preview, the eye icon will be present and clicking it will allow you to preview the resource without enrolling in it.
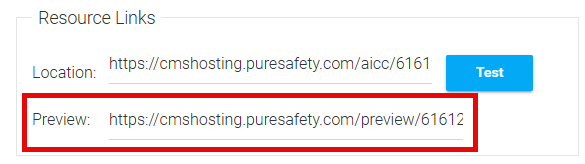
In order for a course to have the preview option, there must be a preview link in the On-line Tab of that resource.
From this tab, you can also click the links within the certificate to navigate to the child courses on the Maintain Learning Resources screen. From there, the child courses can be viewed and edited.
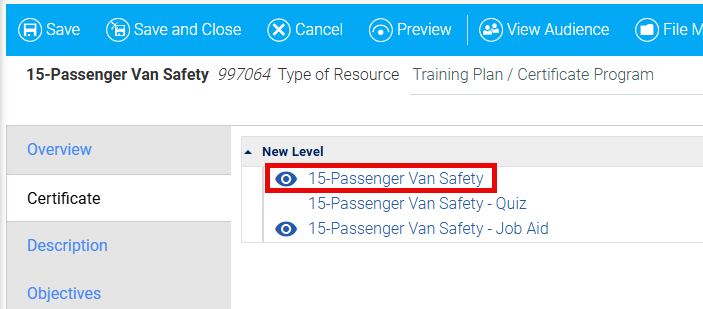
Clicking the back button will not take you back to the certificate learning resource. To return to the certificate, you must navigate to the Maintain Learning Resources screen and locate the certificate.
To manage the contents of a certificate (e.g., add or edit courses, manage required/optional courses, set visibility options, etc.), you must still click the Manage Certificate button in the top toolbar of the certificate.