A learning resource is the basic unit of learning stored in the LMS. Learning resources appear on the Development Plan and Development History, and they can also be made available through the Course Catalog. The Maintain Learning Resources area is where all learning resources are created and managed.
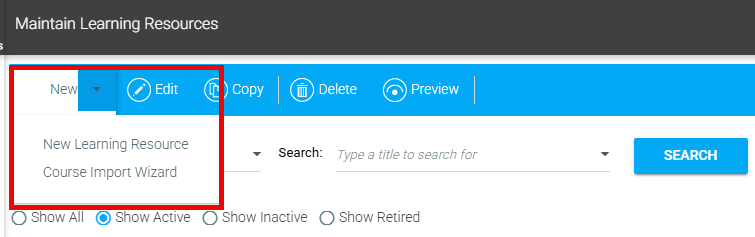
To create a new resource, select New on the Maintain Learning Resources screen. Then, make a selection from the drop-down menu.
The availability of the New button drop-down depends on your system configuration. If the Course Import Wizard is not enabled for your role, the New button will be clickable but will not display a drop-down menu. To request access to the Course Import Wizard, please contact your Company Administrator.
By selecting New Learning Resource, a new learning resource will open, ready to edit. Navigate through the tabs to create and customize the new learning resource, starting with the Overview Tab.
By selecting Course Import Wizard, the wizard will launch, ready to import new courses. See Course_Import_Wizard below.
To find existing resources, use Search in the Maintain Learning Resources page.
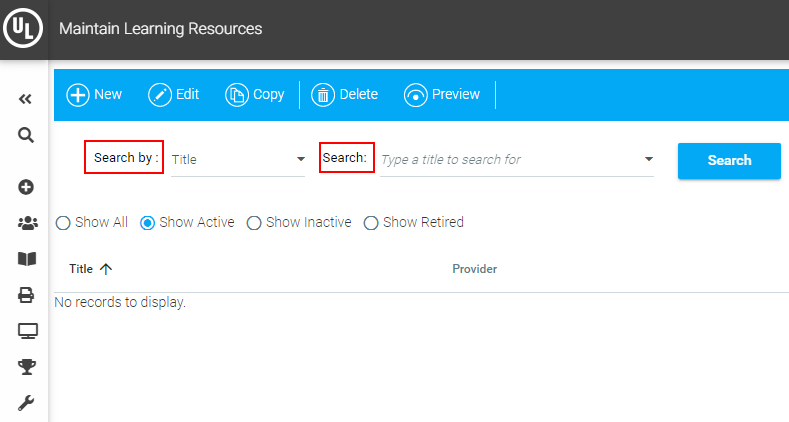
Use the Search by drop-down to select which criteria the Search string will use.

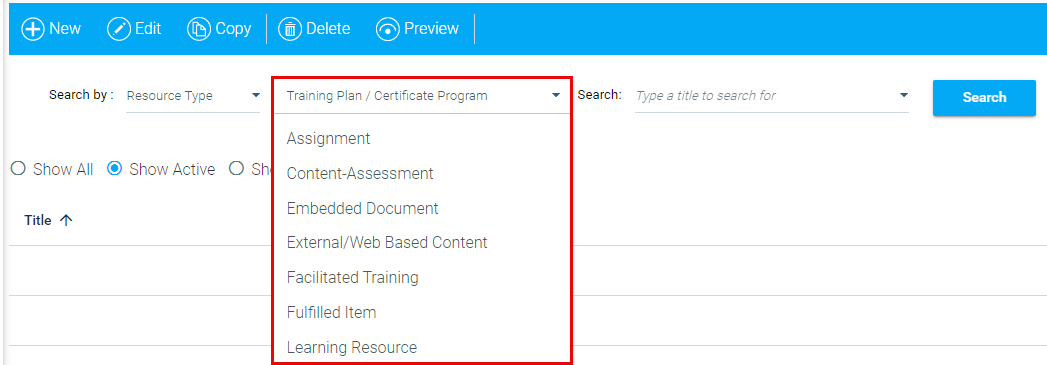
When searching by Resource Type, you will need to select the type of resource from the provided drop-down menu. The default resource type (certificate, facilitated training, assignment, etc.) can be changed according to each client's needs. To have your organization's default search by resource type changed, please contact the Support Team.
In the Search text box, type a search term corresponding to the Search by criteria you chose. Select one of the real-time drop-down search results to go directly to that resource, or hit enter or the Search button to get search results.
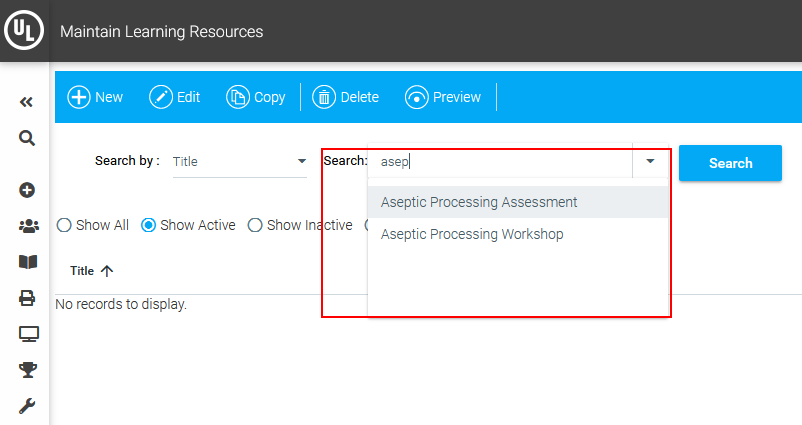
If the Search: text box is left blank, all resources that you're mapped to will display in search results.
If the Search: text box is left blank when a resource status radio button (Show Active, etc.) is selected, all resources with that status that you're mapped to will be displayed in search results.
You can also limit the results by the resource status: Active, Inactive, or Retired.
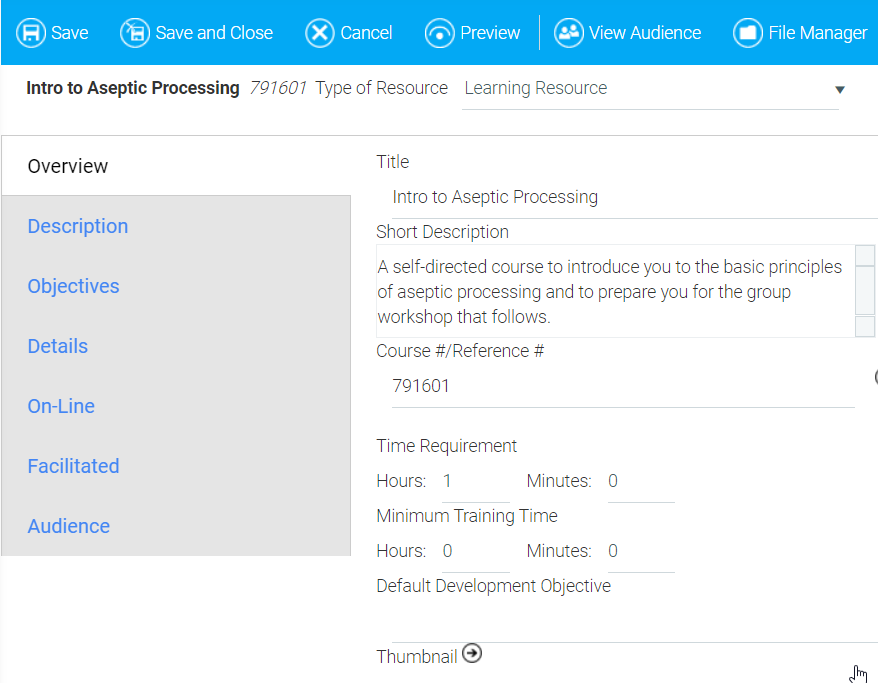
Open a resource and you will see the editing toolbar that lets you Save, Close, Cancel, or Preview changes.

Be sure to save your changes before previewing to ensure that the Preview is correctly displaying all of the changes.
The View Audience button shows you everyone in the audience for this resource.
The File Manager can be used to view and upload documents such as PDFs, such as those used as job aids or e-signature courses.
The File Manager can also be used to replace course content files for existing AICC or SCORM courses that were initially imported using the Course Import Wizard. To replace the existing course content files, use File Manager to upload the new .zip file course package. However, for new AICC or SCORM courses, the Course Import File wizard is the recommended method for the initial import and creation of the course. This creates the proper configuration of the resource and metadata.
Additional tools may appear in the toolbar, based on the type of resource you are editing.
When a resource is open, a left navigation bar shows the various resource configuration sections - Overview, Description, Objectives, Details, On-Line, Facilitated, and Audience.
Learn more about managing each section in Help under The Maintain Learning Resources Screen section of the online help.
The Course Import Wizard is the preferred method for uploading new courses.
You can access the wizard two ways from the Administrator's Console:
The Course Import Wizard can import the following course types:
See below for information on uploading each course type.
After opening the wizard, select Load a new course or courses.

Select the radio button of the course type you wish to upload, which in this case should be AICC, SCORM, or xAPI, and click Next.

Click the Upload button (up arrow) in the center of the wizard to upload the course file. The wizard will list the file types that are acceptable for this upload.

After selecting the file to upload, a pop-up box will appear indicating the progress of the upload. Once completed, you can click Next to move on to the next screen.
Based on the file type you uploaded, the wizard will provide a series of questions pertaining to the course.

Select the Import New Courses Only radio button if you are only uploading new courses. Select the Update Existing Courses/Import New Courses radio button if you are both updating an existing course(s) and importing a new course(s) or if you want to update an existing course(s).
Check the Save courses with active status checkbox if you wish for the courses to automatically be in Active status.
Descriptions - Use the drop-down to select an option. The options include Import Description to Short Description, Import Description to Long Description, and Import Description to Long and Short Descriptions.
Select a Provider, Media type, and Category (all optional) from the drop-down menus. These can also be set through the Maintain Learning Resources screen once the upload is complete. If you are going to wait to add some settings, you should not import the course as Active.
If you would like to set the Primary audience for this course using an Audience Template, select the desired audience template from the Audience Template drop-down.
Check the Link to Template checkbox to ensure that any time the audience template changes, the course audience will also change. If you do not link, the audience for the course will match the audience template in its current state. If the audience template changes later, the course audience will not receive the same change(s).
Once completed, click the Next button. This will initiate the course import.

You will see a list of processes that are set to occur. Click the Next button to continue.

You will see a list of completed processes. Click Finish.
After opening the wizard, select Load a new course or courses.
Select the radio button of the course type you wish to upload, which in this case should be Video, and click Next.

Click the Upload button (up arrow) in the center of the wizard to upload the course file. The wizard will list the file types that are acceptable for this upload.

After selecting the file to upload, a pop-up box will appear indicating the progress of the upload. Once completed, you can click Next to move on to the next screen.
Based on the file type you uploaded, the wizard will provide a series of questions pertaining to the course.

Assign a Title and Short Description (optional) for the course. See below for utilizing the AI tool to do this for you.
Check the Show transcript by default checkbox if you want the transcription to appear by default when a user plays the video. This setting can be changed later by editing the course.
Check the Show closed captions by default checkbox if you wish to have the video display closed captions by default when a user plays the video. This setting can be changed later by editing the course.
Select a Provider, Media type, and Category (all optional) from the drop-down menus. These can also be set through the Maintain Learning Resources screen once the upload is complete. If you are going to wait to add some settings, you should not import the course as Active.
If you would like to set the Primary audience for this course using an Audience Template, select the desired audience template from the Audience Template drop-down.
Check the Link to Template checkbox to ensure that any time the audience template changes, the course audience will also change. If you do not link, the audience for the course will match the audience template in its current state. If the audience template changes later, the course audience will not receive the same change(s).
Check the Send to AI for title, description, time requirement and quiz suggestions checkbox if you wish to use the AI tool to analyze the content and make suggestions. As the title describes, the suggestions the AI tool makes will apply to the course title, description, time requirement, and quiz if you wish to have one. Any suggestions from the AI tool can be accepted, rejected, or edited.
AI suggestions are available only for courses created with the Course Import Wizard. Once the course is created and analyzed, the AI Suggestions can be accessed and reviewed through the Maintain Learning Resources screen. You cannot go back and request AI suggestions from the Maintain Learning Resources screen once the course has been created.
Once completed, click the Next button. This will initiate the course import.

You will see a list of processes that are set to occur. Click the Next button to continue.

You will see a list of completed processes. Clicking the Edit Course Details button will open up the Overview tab for the new learning resource on the Maintain Learning Resources screen.
If you did not utilize AI tool and do not need to review or change anything for the course, you can click Finish.
If you opted to use the AI tool, the Maintain Learning Resources screen will display a star icon at the top right of the screen. Click the icon to access the AI suggestions.

Depending on the size of the content, it might take a few minutes for the AI tool to analyze the content and the icon to appear.
Review the suggestions provided for the title and descriptions. To approve the suggestions, ensure that the Accept checkbox is checked. Uncheck this checkbox to opt out of using the suggestion. You can also make direct edits to the text on this screen.
If you wish to have the wizard generate a quiz, click the Create a quiz for this course checkbox and click Next.
When using the AI tool to generate a quiz, the following settings are enabled by default:
If you wish to change any of these settings, you can edit them directly on the Maintain Learning Resources screen.

After generating a quiz, the question and answer suggestions will appear for review.
You can edit the text of the questions and answers directly in the text boxes. If you do not wish to use a question, click the trash can to delete it. The wizard will automatically renumber the questions.

When finished, click the Next button.
From here, you can choose to have the wizard package the course you just imported along with the AI-generated quiz together into a certificate. To do this, check the Create a certificate containing this course and quiz checkbox.
When using the AI tool to create a certificate, the following settings are enabled by default:
If you wish to change any of these settings, you can edit them directly on the Maintain Learning Resources screen.

The certificate title defaults to the course title "- With Quiz" (see example above).
Click Finish to finalize the course import.
After opening the wizard, select Load a new course or courses.
Select the radio button of the course type you wish to upload, which in this case should be Read and Sign, and click Next.

Click the Upload button (up arrow) in the center of the wizard to upload the course file. The wizard will list the file types that are acceptable for this upload.

After selecting the file to upload, a pop-up box will appear indicating the progress of the upload. Once completed, you can click Next to move on to the next screen.
Based on the file type you uploaded, the wizard will provide a series of questions pertaining to the course.

Assign a Title and Short Description (optional) for the course. See below for utilizing the AI tool to do this for you.
Select a Provider, Media type, and Category (all optional) from the drop-down menus. These can also be set through the Maintain Learning Resources screen once the upload is complete. If you are going to wait to add some settings, you should not import the course as Active.
If desired, enter a Time Requirement for the course.
If you would like to set the Primary audience for this course using an Audience Template, select the desired audience template from the Audience Template drop-down.
Check the Link to Template checkbox to ensure that any time the audience template changes, the course audience will also change. If you do not link, the audience for the course will match the audience template in its current state. If the audience template changes later, the course audience will not receive the same change(s).
Check the Send to AI for title, description, time requirement and quiz suggestions checkbox if you wish to use the AI tool to analyze the content and make suggestions. As the title describes, the suggestions the AI tool makes will apply to the course title, description, time requirement, and quiz if you wish to have one. Any suggestions from the AI tool can be accepted, rejected, or edited.
AI suggestions are available only for courses created with the Course Import Wizard. Once the course is created and analyzed, the AI Suggestions can be accessed and reviewed through the Maintain Learning Resources screen. You cannot go back and request AI suggestions from the Maintain Learning Resources screen once the course has been created.
You will see a list of processes that are set to occur. Click the Next button to continue. This will initiate the course upload.

You will see a list of completed processes. Clicking the Edit Course Details button will open up the Overview tab for the new learning resource on the Maintain Learning Resources screen.

If you did not utilize the AI tool and do not need to review or change anything for the course, you can click Finish.
If you opted to use the AI tool, the Maintain Learning Resources screen will display a star icon at the top right of the screen. Click the icon to access the AI suggestions.
Depending on the size of the content, it might take a few minutes for the AI tool to analyze the content and the icon to appear.
Review the suggestions provided for the title and descriptions. To approve the suggestions, ensure that the Accept checkbox is checked. Uncheck this checkbox to opt out of using the suggestion. You can also make direct edits to the text on this screen.
If you wish to have the wizard generate a quiz, click the Create a quiz for this course checkbox and click Next.
When using the AI tool to generate a quiz, the following settings are enabled by default:
If you wish to change any of these settings, you can edit them directly on the Maintain Learning Resources screen.
After generating a quiz, the question and answer suggestions will appear for review.
You can edit the text of the questions and answers directly in the text boxes. If you do not wish to use a question, click the trash can to delete it. The wizard will automatically renumber the questions.

When finished, click the Next button.
From here, you can choose to have the wizard package the course you just imported along with the AI-generated quiz together into a certificate. To do this, check the Create a certificate containing this course and quiz checkbox.
When using the AI tool to create a certificate, the following settings are enabled by default:
If you wish to change any of these settings, you can edit them directly on the Maintain Learning Resources screen.
The certificate title defaults to the course title "- With Quiz" (see example above).
Click Finish to finalize the course import.
After opening the wizard, select Load a new course or courses.
Select the radio button of the course type you wish to upload, which in this case should be PowerPoint, and click Next.

Click the Upload button (up arrow) in the center of the wizard to upload the course file. The wizard will list the file types that are acceptable for this upload.

After selecting the file to upload, a pop-up box will appear indicating the progress of the upload. Once completed, you can click Next to move on to the next screen.
Based on the file type you uploaded, the wizard will provide a series of questions pertaining to the course.

Assign a Title and Short Description (optional) for the course. See below for utilizing the AI tool to do this for you.
Select a Provider, Media type, and Category (all optional) from the drop-down menus. These can also be set through the Maintain Learning Resources screen once the upload is complete. If you are going to wait to add some settings, you should not import the course as Active.
Choose the Navigation Option from the drop-down menu. Manual Navigation is chosen by default. You can choose to have the presentation auto-advance instead.
Use the Default Slide Time Requirement field to indicate the length of time in seconds that a slide must display on the user's screen if the Auto-Advance Navigation option was selected. If using Manual Navigation, there is no need to fill out this field as it will have no effect.
Check the Include Slide Notes checkbox if you wish to include slide notes from the presentation.
If you would like to set the Primary audience for this course using an Audience Template, select the desired audience template from the Audience Template drop-down.
Check the Link to Template checkbox to ensure that any time the audience template changes, the course audience will also change. If you do not link, the audience for the course will match the audience template in its current state. If the audience template changes later, the course audience will not receive the same change(s).
Check the Send to AI for title, description, time requirement and quiz suggestions checkbox if you wish to use the AI tool to analyze the content and make suggestions. As the title describes, the suggestions the AI tool makes will apply to the course title, description, time requirement, and quiz if you wish to have one. Any suggestions from the AI tool can be accepted, rejected, or edited.
AI suggestions are available only for courses created with the Course Import Wizard. Once the course is created and analyzed, the AI Suggestions can be accessed and reviewed through the Maintain Learning Resources screen. You cannot go back and request AI suggestions from the Maintain Learning Resources screen once the course has been created.
You will see a list of processes that are set to occur. Click the Next button to continue. This will initiate the course upload.

You will see a list of processes. Clicking the Edit Course Details button will open up the Overview tab for the new learning resource on the Maintain Learning Resources screen.

If you did not utilize the AI tool and do not need to review or change anything for the course, you can click Finish.
If you opted to use the AI tool, the Maintain Learning Resources screen will display a star icon at the top right of the screen. Click the icon to access the AI suggestions.
Depending on the size of the content, it might take a few minutes for the AI tool to analyze the content and the icon to appear.
Review the suggestions provided for the title and descriptions. To approve the suggestions, ensure that the Accept checkbox is checked. Uncheck this checkbox to opt out of using the suggestion. You can also make direct edits to the text on this screen.
If you wish to have the wizard generate a quiz, click the Create a quiz for this course checkbox and click Next.
When using the AI tool to generate a quiz, the following settings are enabled by default:
If you wish to change any of these settings, you can edit them directly on the Maintain Learning Resources screen.
After generating a quiz, the question and answer suggestions will appear for review.
You can edit the text of the questions and answers directly in the text boxes. If you do not wish to use a question, click the trash can to delete it. The wizard will automatically renumber the questions.

When finished, click the Next button.
From here, you can choose to have the wizard package the course you just imported along with the AI-generated quiz together into a certificate. To do this, check the Create a certificate containing this course and quiz checkbox.
When using the AI tool to create a certificate, the following settings are enabled by default:
If you wish to change any of these settings, you can edit them directly on the Maintain Learning Resources screen.
The certificate title defaults to the course title "- With Quiz" (see example above).
Click Finish to finalize the course import.
The course import template must be used when creating new 3rd party courses or other non-eLearning courses. The template is also useful for uploading courses (both eLearning and non-eLearning) that are needed only for historical purposes.
The template should follow this format:
|
Column |
Header |
Description |
|---|---|---|
|
A |
Course Name |
Required
|
|
B |
Course ID |
Optional
|
|
C |
Short Description |
Optional
|
|
D |
Long Description |
Required
|
|
E |
Course Objectives |
Optional
|
|
F |
Keywords |
Optional
|
|
G |
Active |
Required
|
|
H |
Estimated Time |
Required
|
|
I |
Estimated Time (text) |
Required
|
|
J |
Provider |
Required
|
|
K |
Recommendations |
Optional
|
|
L |
System Requirements |
Optional
|
|
M |
Media Type |
Required
|
|
N |
Score Model |
Required Enter one of the following values to define when the course should be marked complete:
|
|
O |
Course Type |
Optional Enter the Course Type ID. Options are:
|
|
P |
Launch URL |
Optional Enter the launch URL. This is typically only applicable when creating 3rd party courses. |
|
Q |
Audience Description |
Optional
|
|
R |
Price |
Optional Enter the participant cost for the course. Cost must be entered in the following format: 1.00 |
|
S |
Compliance/ Standards Model |
Required Enter the compliance model for this course. Options are:
|
In the template there are fields for the course provider ID and the media type ID. Both of these ID numbers are different for each and every system, so the easiest way to find these numbers for your system is to create an ad hoc report.
To create this report, go to Reports > Administer Reports in the Administrator menu. The columns for the report should include:
The provider IDs can also be found on the Maintain Providers screen, listed under Tools on the Administrator menu.
After opening the wizard, select Load a new course or courses.
Select the radio button of the course type you wish to upload, which in this case should be Excel/Clipboard, and click Next.

You will be prompted to provided information on the type of data that will be transferred in the upload. If you have created your template in the standard Excel format, select “Tab” (default) as the Separator type.

Select the radio button next to the appropriate Separator (tab, commas, semi-colon, or line break).
If appropriate, check the First row contains column headers checkbox.
Click Next. You will be prompted to copy and paste the data into the space on the screen using the separators designated on the previous screen.

Click Next. Any issues with the data will be displayed. Common Errors include: Incorrect information, missing required information, and data in the wrong format. If necessary, click the Previous button to return to the previous screen. Make any necessary corrections to the upload and then paste it again. When all of the information on the upload is correct, you will see a confirmation screen.
If no changes need to be made, click Next again.
Based on the file type you uploaded, the wizard will provide a series of questions pertaining to the course.

Select the Import New Courses Only radio button if you are only uploading new courses. Select the Update Existing Courses/Import New Courses radio button if you are both updating an existing course(s) and importing a new course(s) or if you want to update an existing course(s).
If you would like to set the Primary audience for this course using an Audience Template, select the desired audience template from the Audience Template drop-down.
Check the Link to Template checkbox to ensure that any time the audience template changes, the course audience will also change. If you do not link, the audience for the course will match the audience template in its current state. If the audience template changes later, the course audience will not receive the same change(s).
Once completed, click the Next button. This will initiate the course import.

You will see a list of completed processes. Click Finish to complete the course import.

In addition to uploading new course files, the Course Import Wizard can also be used to upload updated course files to an existing course. When this process is used, the Wizard will automatically remove all (including all languages) of the previous course files for the selected course.
If your system utilizes advanced resource permissions, only a company administrator or the course owner will be able to update an existing course.
To process these updated course files:
Go to the Course Import Wizard, and select the option Update AICC, SCORM, or xAPI Content.

Begin typing in the name of the course that is going to be updated. Select the correct course when the title appears and click Next.

The LMS will warn you that all previous course files will be removed. Click OK to continue.

Upload the zip file containing the new course files.

Once the zip file has been successfully loaded, the LMS will confirm that the process has been completed. If you need to make additional edits to this course, click the Edit Course Details button to access the edit resource screen on Maintain Learning Resources.

If no additional changes need to be made, click Finish.