LearnShare reports have always had the option to open in Excel, allowing you to create tables, charts, and graphs. The Web Query (HTML) option expands these capabilities by generating an HTML file, accessible as a URL, that can be used to create a dynamic report.
With the Web Query option (or .csv option), you can link an Excel sheet to an existing LMS report, have the report run on a scheduled basis to update the data in that report, and configure your Excel sheet to pull the new data in dynamically upon every open of the worksheet. That data exists in one tab, and you’re free to create pivot tables and other tabs with charts that are then automatically refreshed when the worksheet is opened. This way you have an Excel presentation with a dynamic link to your LMS data via LMS Reporting and the Excel Web Query. This auto update functionality allows you to essentially format a report one time in Excel, including charts and pivot tables, and then automatically update the data throughout your report, including any tables etc that were initially created, every time you (or the scheduled report feature) rerun the same report.
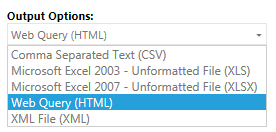
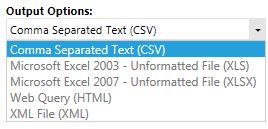
Run a report and select Web Query (HTML) as the output option.
If desired, set this report up as a scheduled report. If you do not schedule the report, you will need to manually reprocess the report every time that you need to have the data updated. Remember to use a flexible date range.
Remember when you schedule or reprocess a report, the URL is the same as the original report.
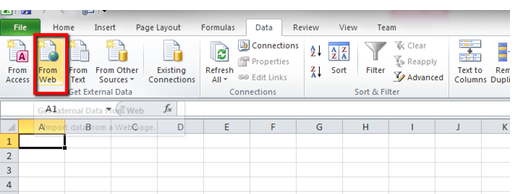
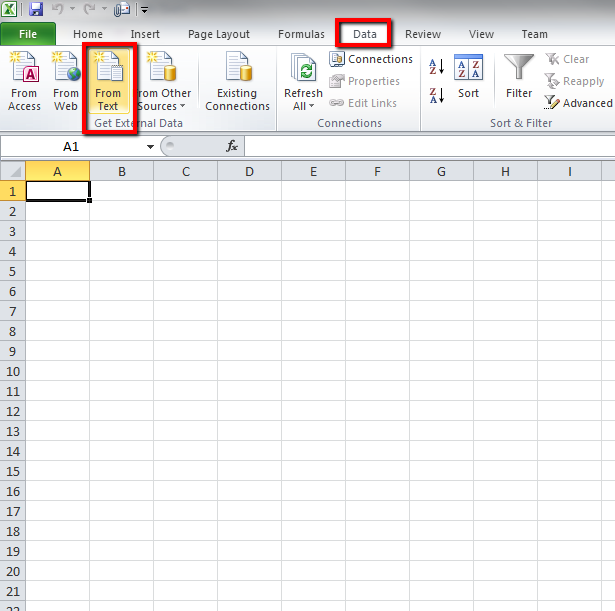
Open a new Excel Workbook, navigate to the Data tab and click on From Web.
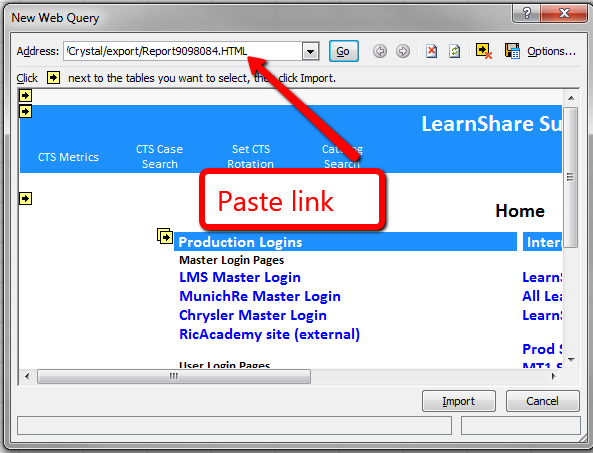
Copy the url from the report or scheduled report link if one was created.
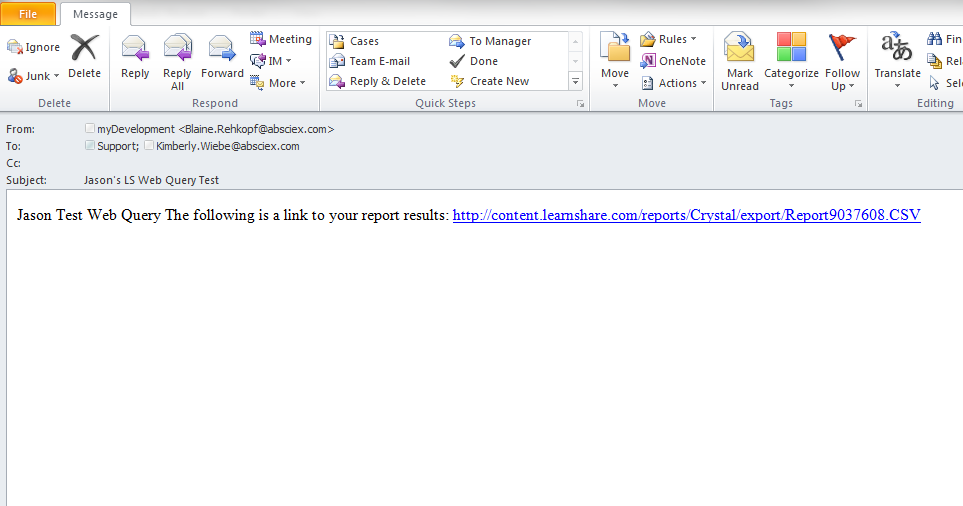
Tip: An easy way to get the URL is to have the LMS send you the report via email. This will paste the URL into an email that you can then copy onto a clipboard.
Paste the URL in the Excel address field and click the Go button to the right of the Address window.
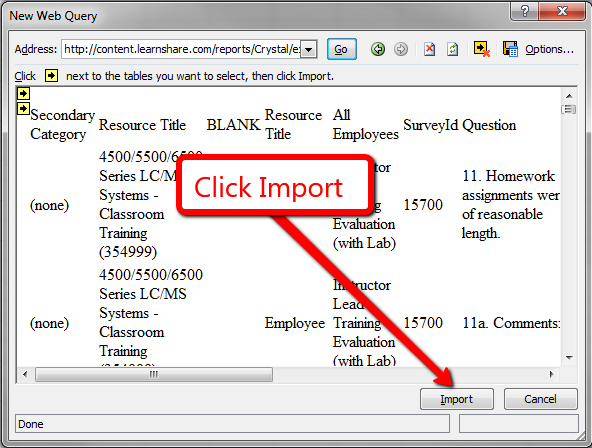
Next click the Import button at the bottom of Excel's New Web Query window.
Set up this initial file as you would any new report. Create any formatting options that you want. Once that's done, you will need to change the settings to refresh with new data when opened.
On the Data tab, select Properties to open the External Data Range Properties box.
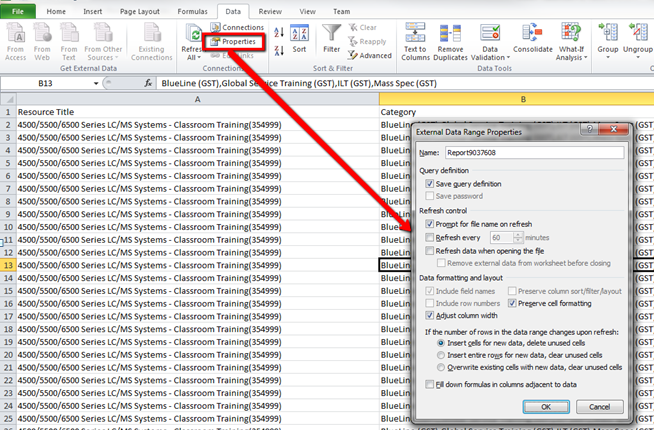
Select the “Prompt for file name on refresh” checkbox (the label may read “Enable Background Refresh” depending on Excel version). This will allow you to change the name of the file upon open to maintain historical data without overwriting it.
Select the “Refresh data when opening the file” checkbox. This will bring in the new data from the file link you added when setting up the Excel file.
Click OK. Now every time you open the file, Excel fetches new data from the report file on the LMS server.
Once you have saved the Excel worksheet, you can copy it and send it to others, and every time that they open the worksheet the data will automatically refresh.
If you do not have the Web Query option in your LMS, a .csv file can also be used. Follow these steps to dynamically link a LMS report to Excel.
Run a report and select CSV as the output option.
If desired, set this report up as a scheduled report. If you do not schedule the report, you will need to manually reprocess the report everytime that you need to have the data updated. Remember to use a flexible date range.
Open a new Excel Workbook, navigate to the Data tab, and click on From Text.
Copy the link that is sent in the email of the scheduled report or have the LMS send you the report via email if this is not a scheduled report.
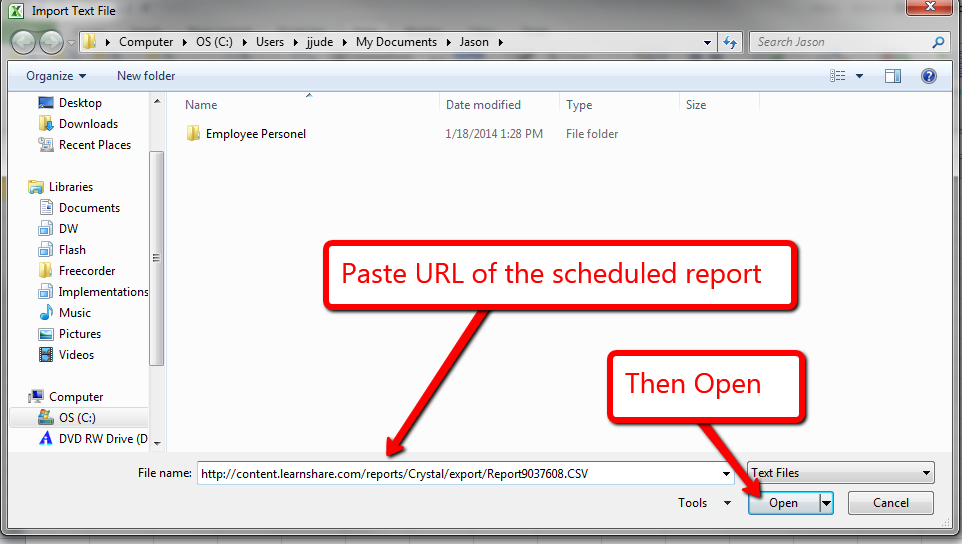
Paste the link into the File Name field of the Excel Import Text File window and click Open (or Import depending on Excel version).
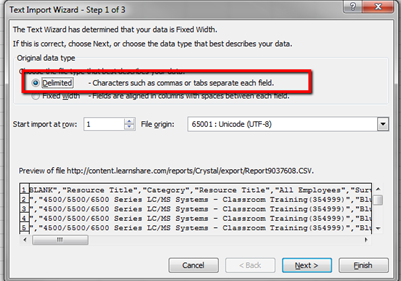
The Text Import Wizard box will appear.
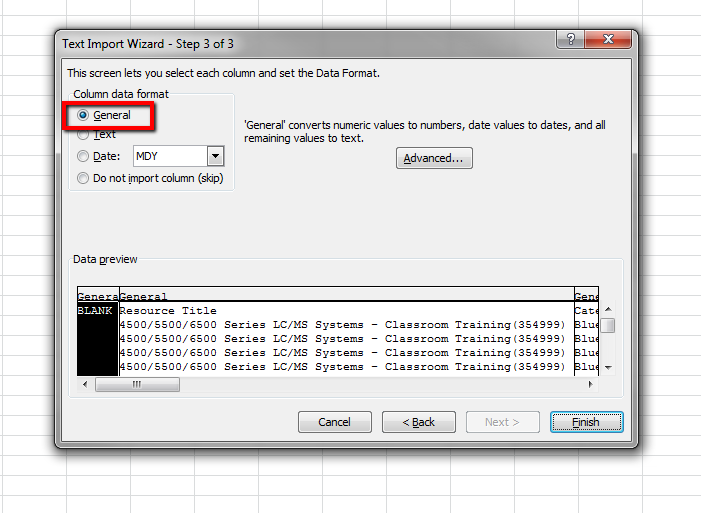
Under Original Data Type, select the Delimited option, as this is file is in the CSV file format. Leave defaults for the other fields.
Click Next.
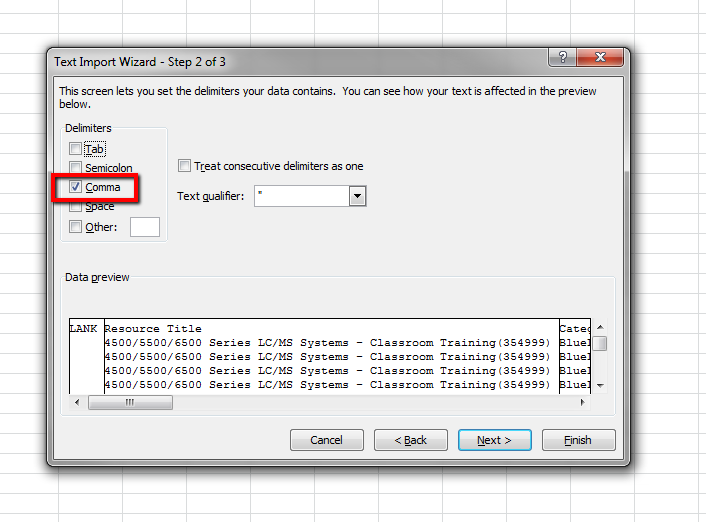
Under Delimiters: de-select Tab and select Comma.
Click Next.
Under Column Data Format, select General.
Click Finish.
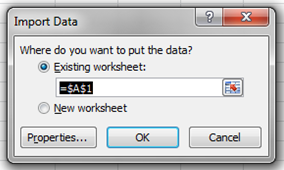
Click OK in the Import Data window.
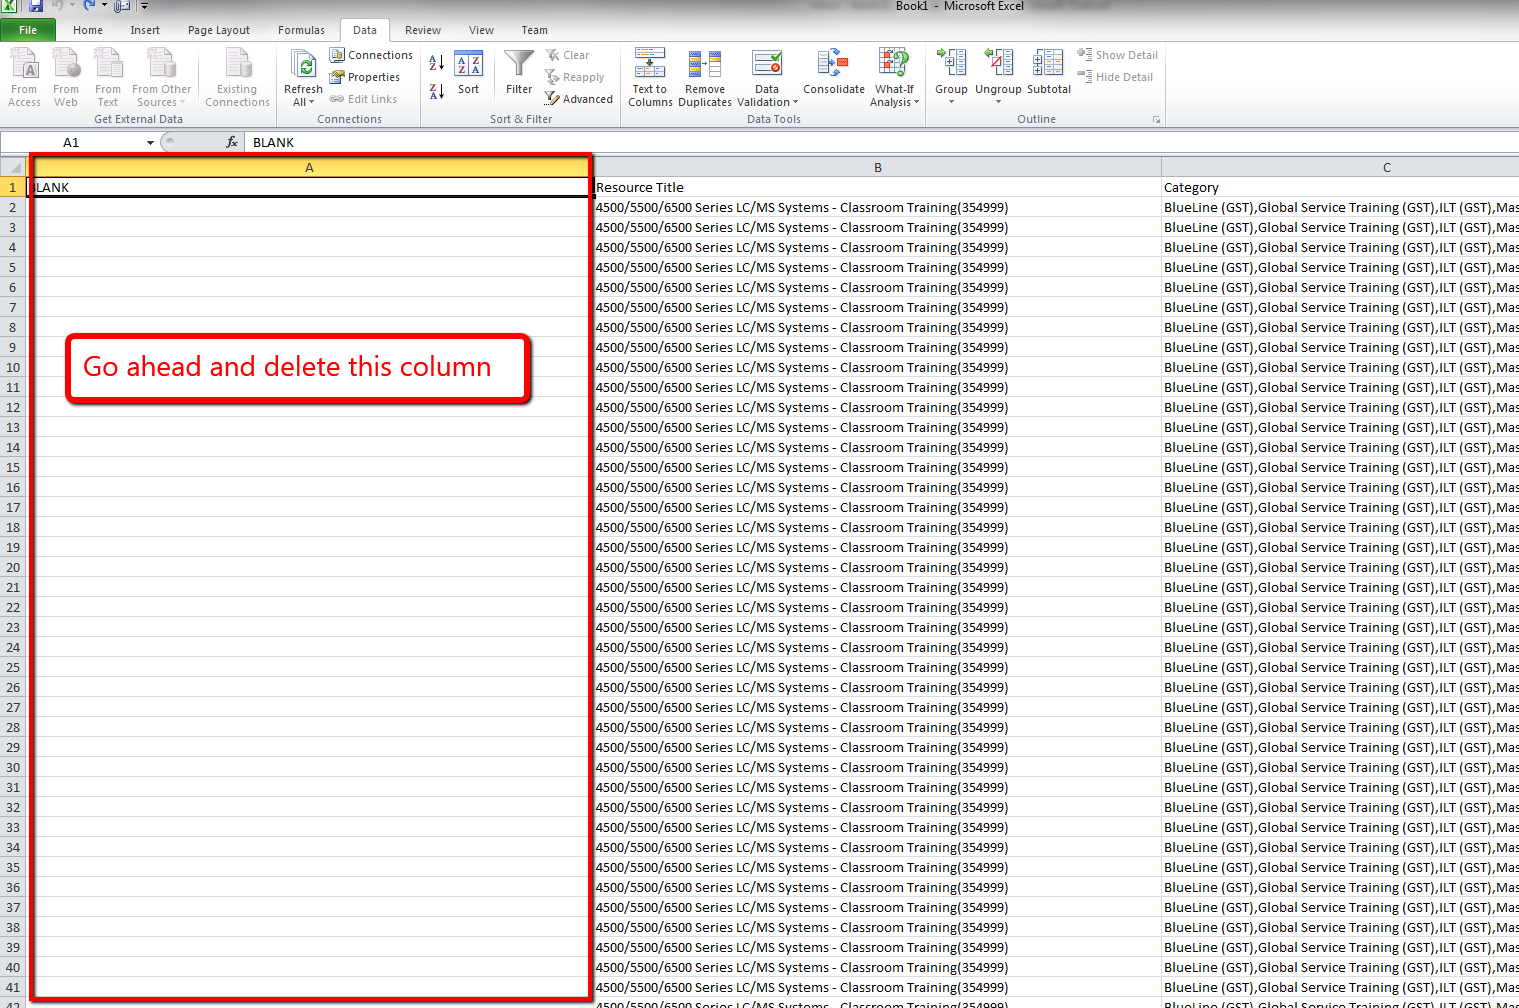
You will now see your data in Excel. The first column will be blank. You can delete this column.
Format the initial file as desired. When that is done, you will need to change the settings to refresh with new data when opened.
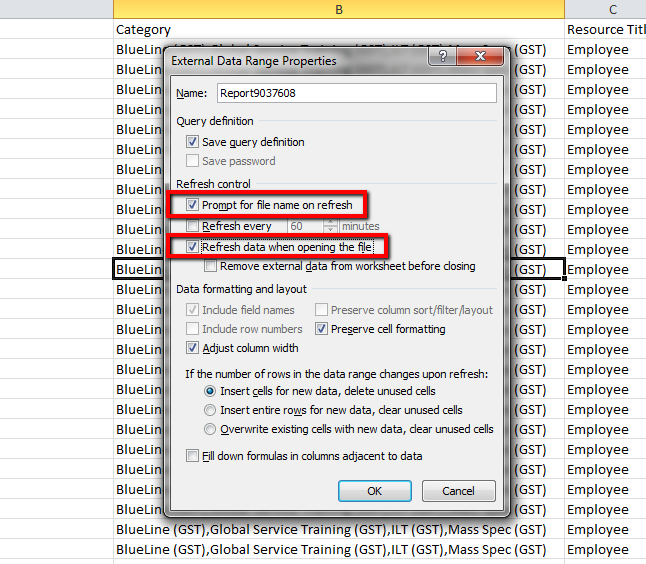
On the Data tab, select Properties to open the External Data Range Properties box.
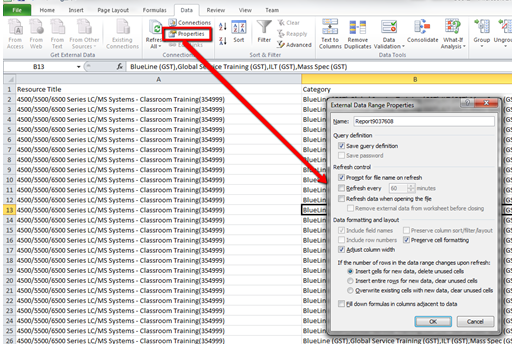
Select “Prompt for file name on refresh” checkbox. This will allow you to change the name of the file upon open to maintain historical data without overwriting it.
Select the “Refresh data when opening the file” checkbox. This will bring in the new data from the file link you added when setting up the Excel file.

Click OK. Now every time you open the file, it opens the file that is located on the server that the link in the scheduled email points to.